Introduction
SNMP (Simple Network Management Protocol) is a network management standard protocol based on the TCP/IP protocol stack, adopting the Client-Server architecture model. This protocol provides a standardized device monitoring and management interface through the Management Information Base (MIB).
Core Functional Features
- Device Status Monitoring: Real-time acquisition of network device operating parameters
- Performance Data Acquisition: Collect metrics such as bandwidth utilization, CPU load, and memory usage
- Configuration Management: Remotely modify device configuration parameters
- Fault Alarm: Actively Push Abnormal Event Notifications
| Version | Security Features | Authentication Mechanism | Encryption Support | Applicable Scenarios |
| SNMPv1 | Foundation | Community string | None | Intranet Monitoring |
| SNMPv2c | Enhanced | Community string | None | General Application |
| SNMPv3 | Advanced | User Authentication | Support | environment with high security requirements |
Configuration steps
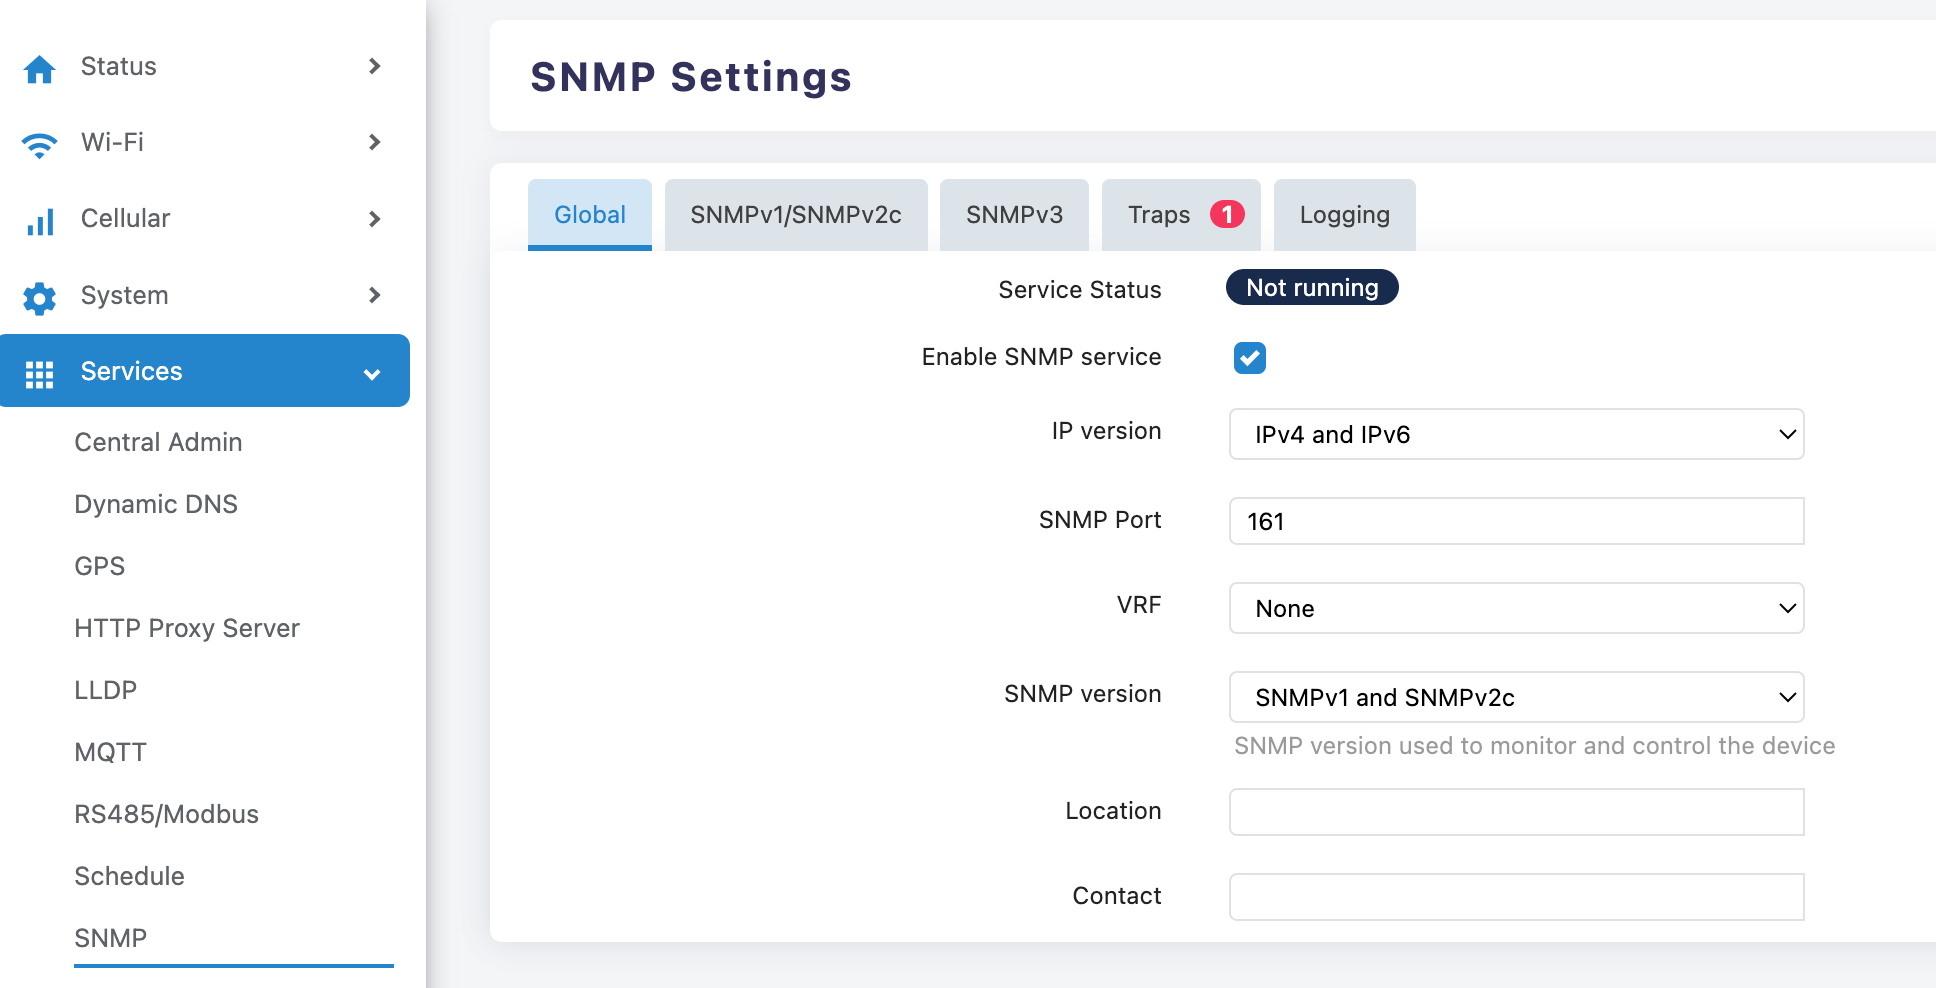
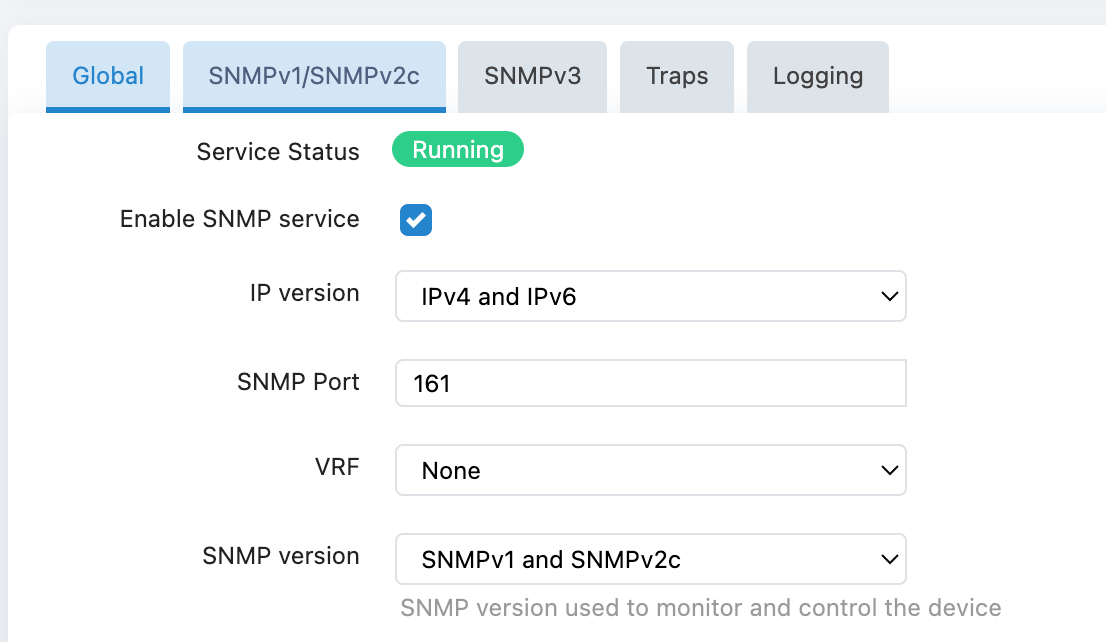
Basic Service Configuration
Service Enablement Settings:
- Check the "Enable SNMP service" checkbox
- Confirm that the service status is displayed as enabled
Network Parameter Configuration:
- IP Version: Select "IPv4 and IPv6" (Supports Dual Protocol Stack)
- SNMP Port: The default value "161" can be retained
- VRF: Keep the default value "None"
- SNMP Version: Select "SNMPv1 and SNMPv2c" or "SNMPv1 and SNMPv2c and SNMPv3" or "only SNMPv3"
Access Control Configuration
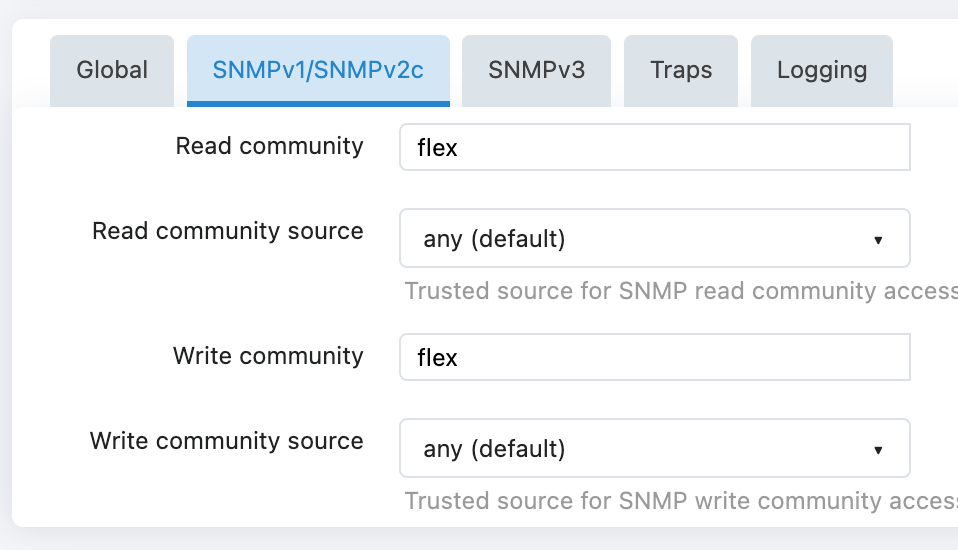
SNMPv1/SNMPv2c Configuration
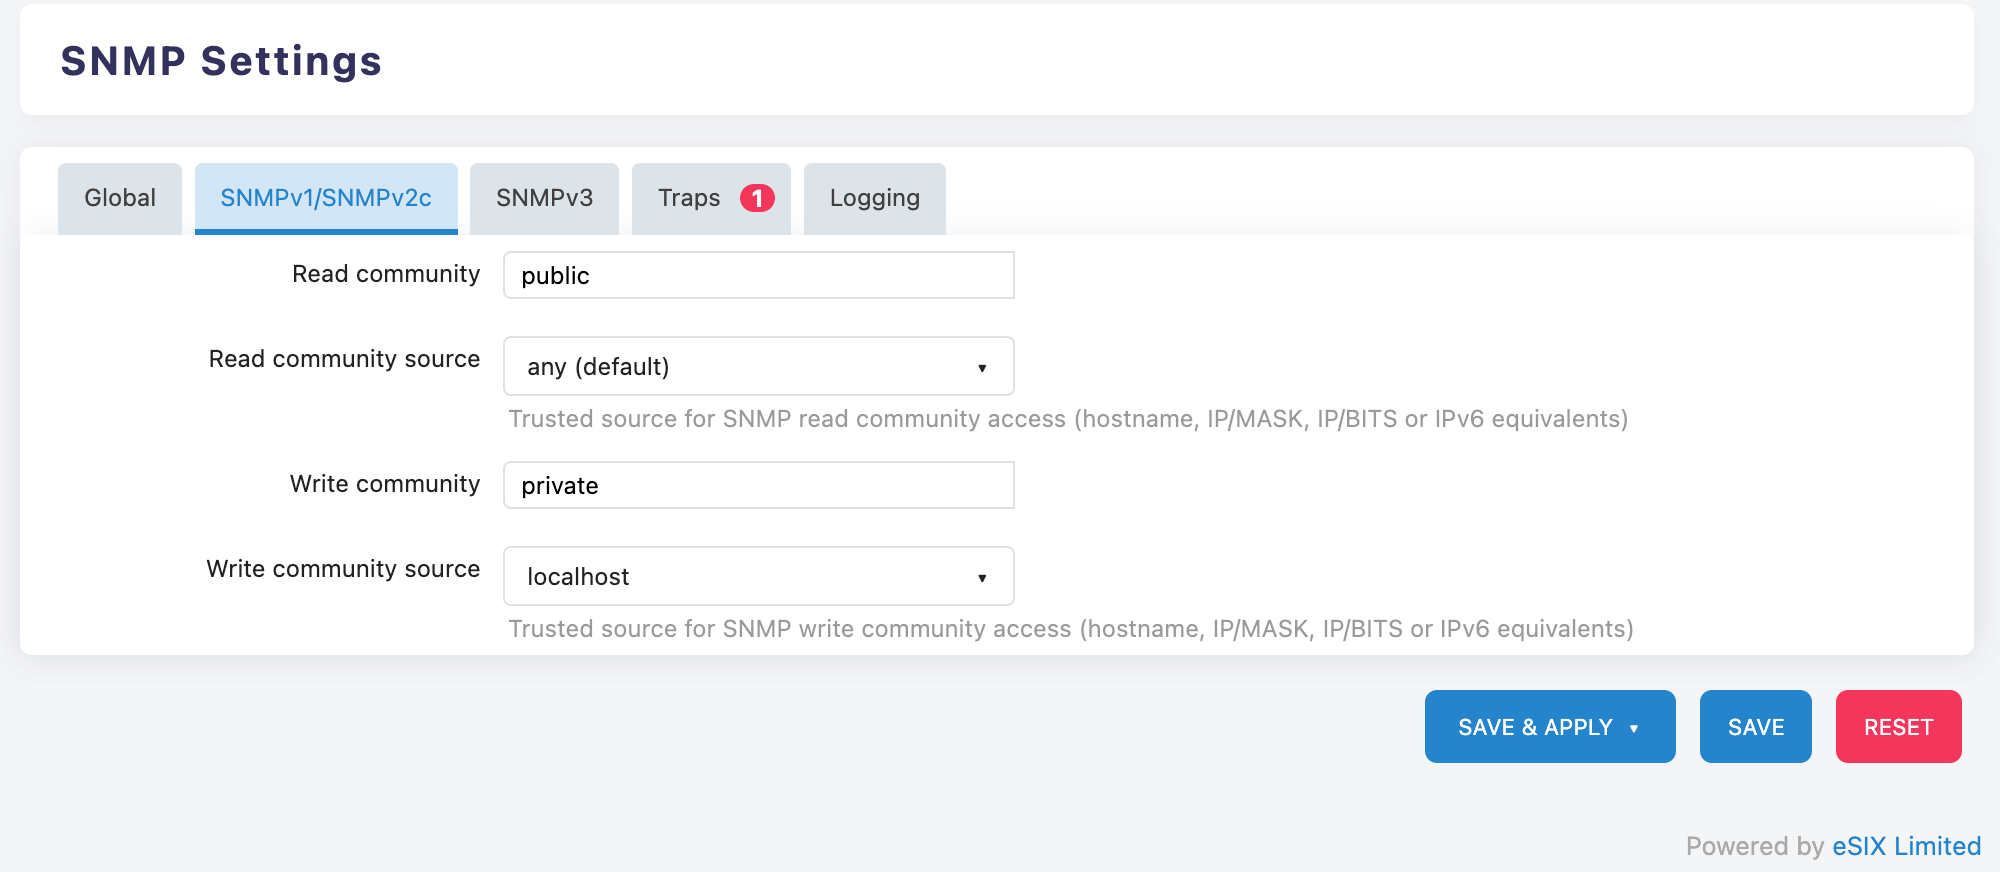
Click on the "SNMPv1/SNMPv2c" tab to perform the following configuration:
Read-only access settings:
Read community (read-only community name):
- Change the default value "public" to a secure string
Read community source (read-only access source):
- Default is "any (default)" (allows access from any IP)
- can be modified to the SNMP server IP Address
Read/Write Access Settings:
Write community (Read/Write Community Name):
- Change the default value "private" to a secure string
Write community source (Read/Write Access Source):
- The default is "localhost" (accessible only from the local machine)
- can be modified to the management station IP address
SNMPv3
If you need a higher level of security, click the "SNMPv3" tab:
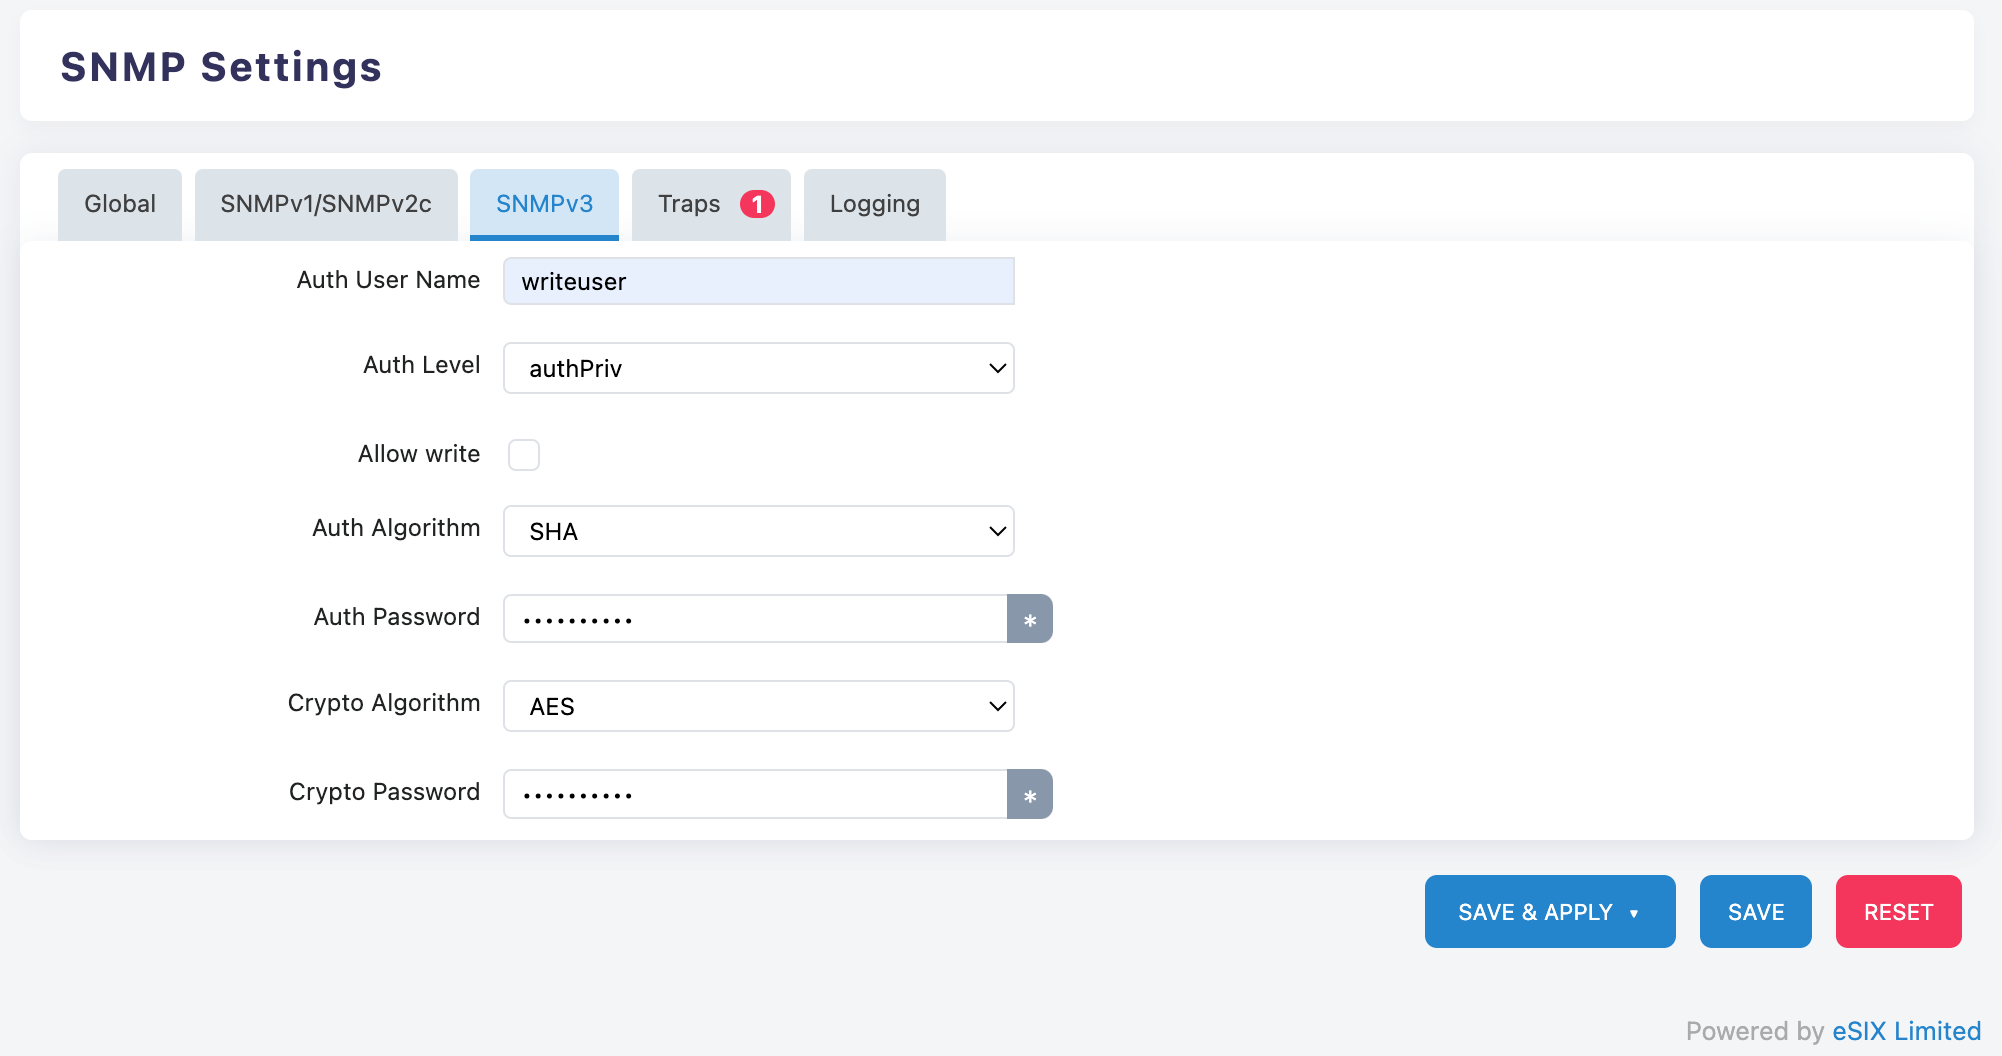
User Authentication Settings:
Auth User Name (Authenticated User Name): Enter User Name
- Example: writeuser or admin
Auth Level (Authentication Level): Select "authPriv" (Recommended)
Allow write: Check as needed
Security Algorithm Configuration:
- Auth Algorithm (Authentication Algorithm): Select "SHA"
- Auth Password (Authentication Password): Set a strong password with more than 8 characters
- Crypto Algorithm (Encryption Algorithm): You can choose "AES" or "DES"
- Crypto Password (Encrypted Password): Set a strong password with more than 8 characters
Alarm Configuration
SNMP Traps Settings
Click on the "Traps" tab to configure alarms:
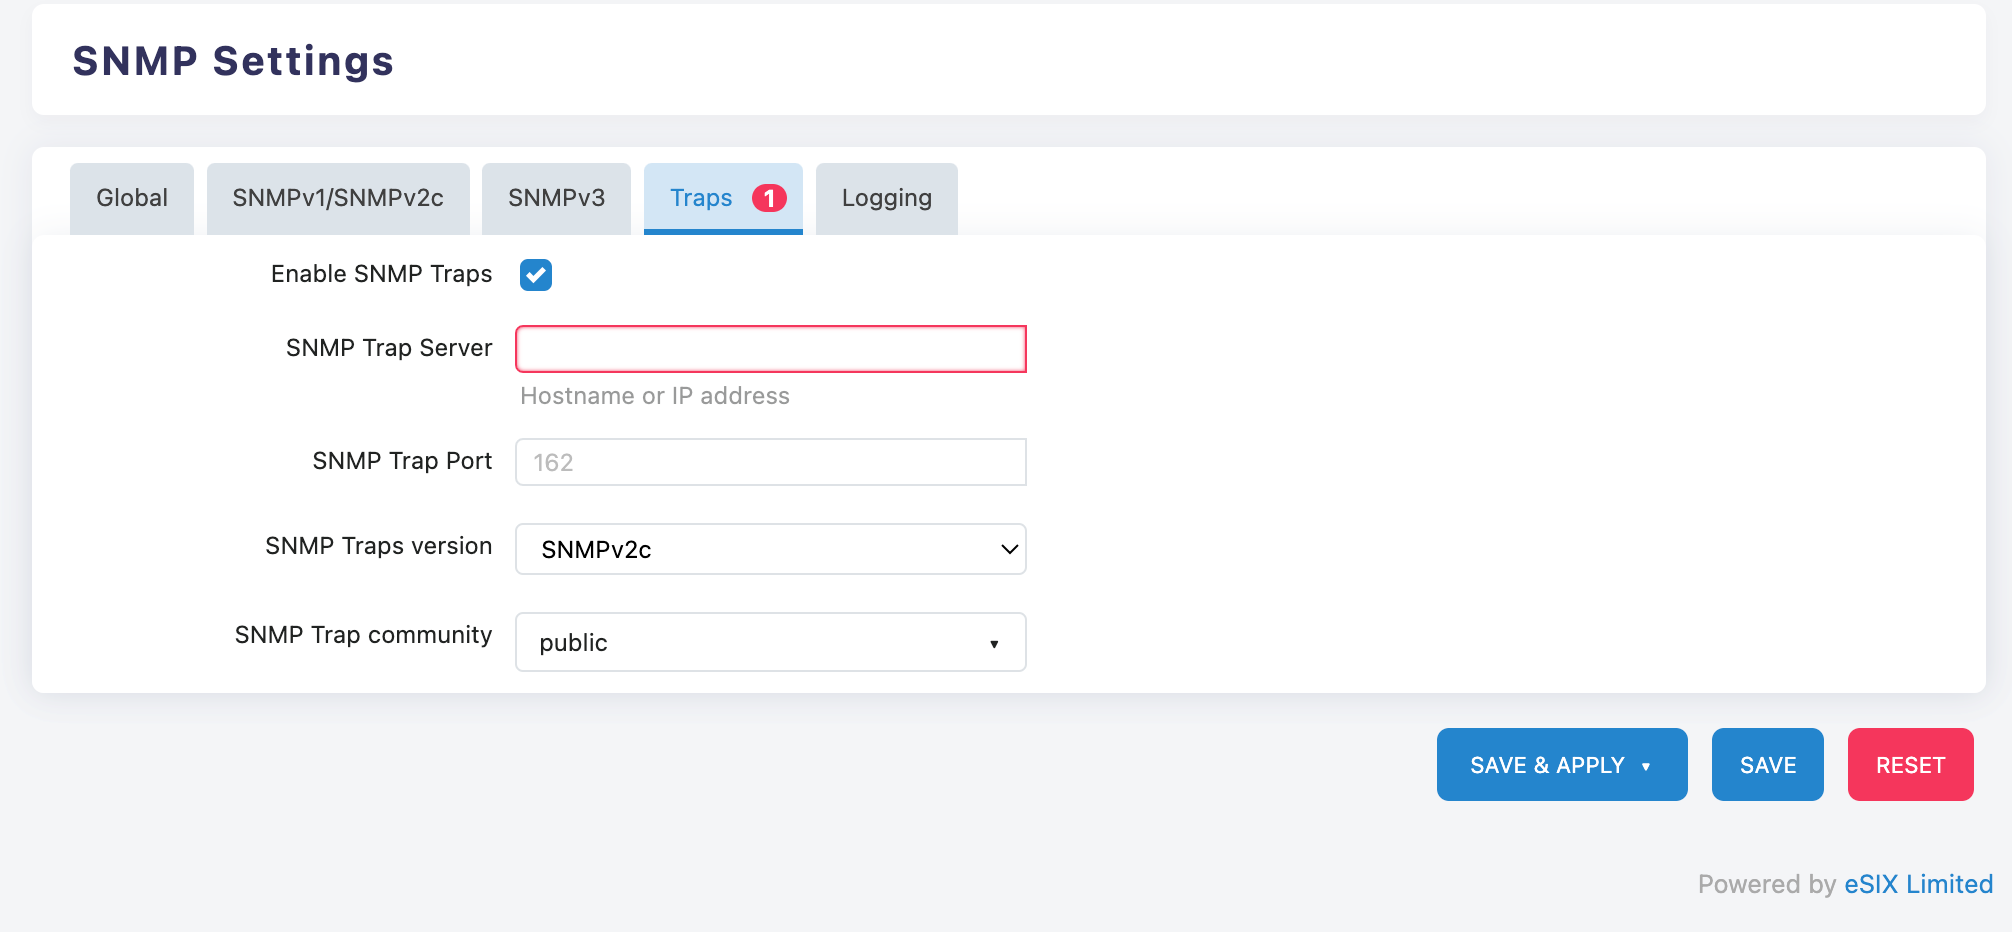
Basic Settings:
Check "Enable SNMP Traps" to enable the alarm function
SNMP Trap Server: Enter the IP Address of the server that receives alerts
- Example:
192.168.1.50(Monitoring Server Address)
- Example:
SNMP Trap Port: Keep the default value "162"
SNMP Traps Version: Select "SNMPv2c" or "SNMPv3"
SNMP Trap Community: Modify the default community name
- Change "public" to a secure string
- Example: company_trap_2024
Alarm Event Description:
The system will automatically send the following event alarms:
- Device Startup/Restart Notification
- Network Interface Status Change
- Authentication Failure Event
- System Abnormality Alarm
Log Configuration
Log Recording Settings
Click on the "Logging" tab:
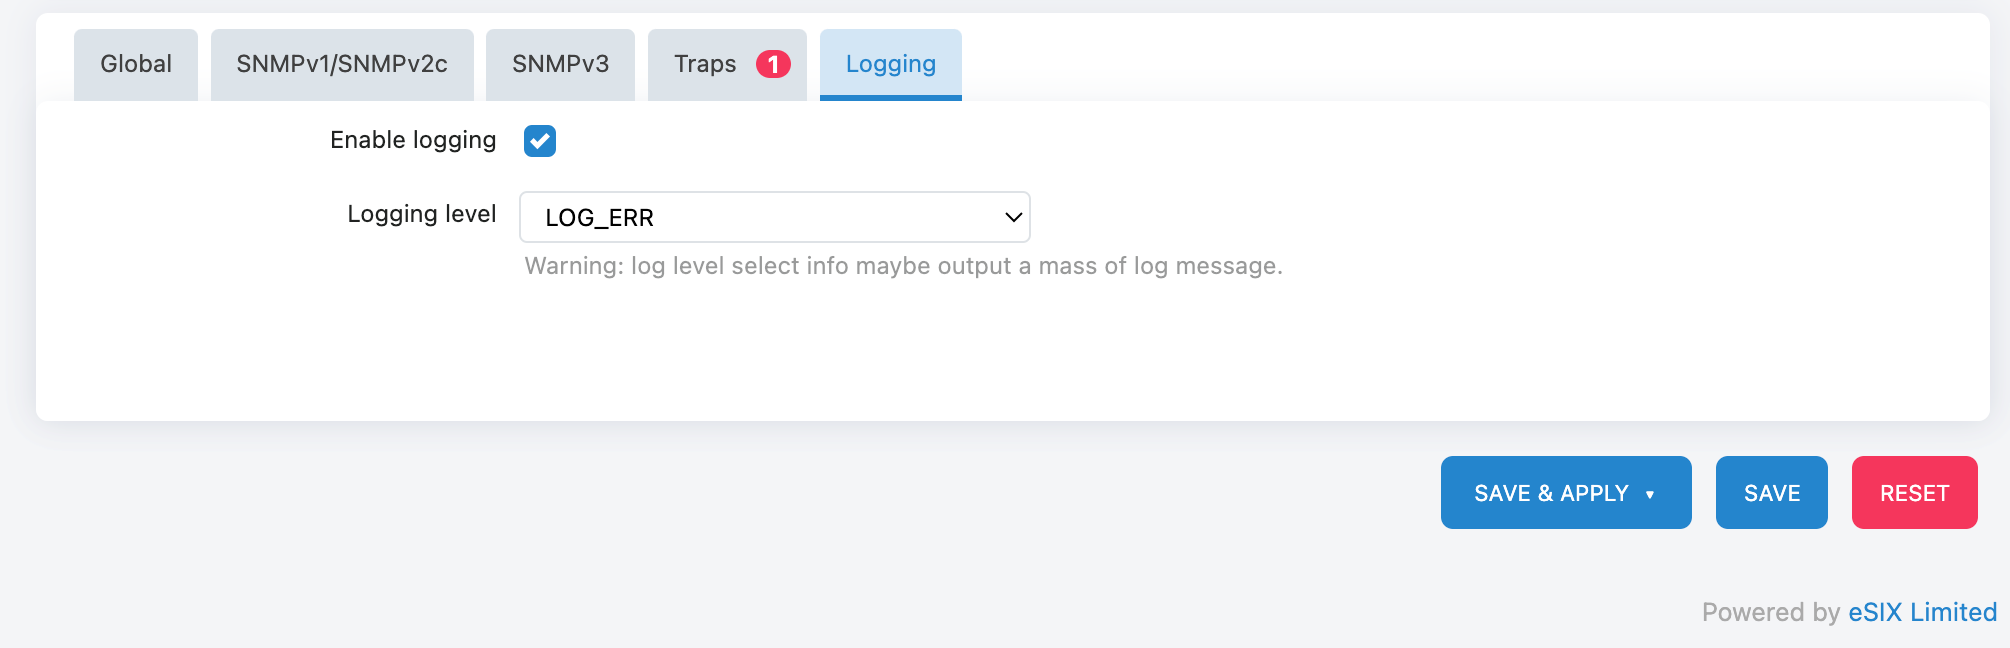
Log Function Enabled:
Check "Enable logging" to enable logging
Logging Level: Select the logging level
- LOG_ERR: Only log error messages (recommended for daily use)
- LOG_DEBUG: Records detailed debugging information (used for troubleshooting)
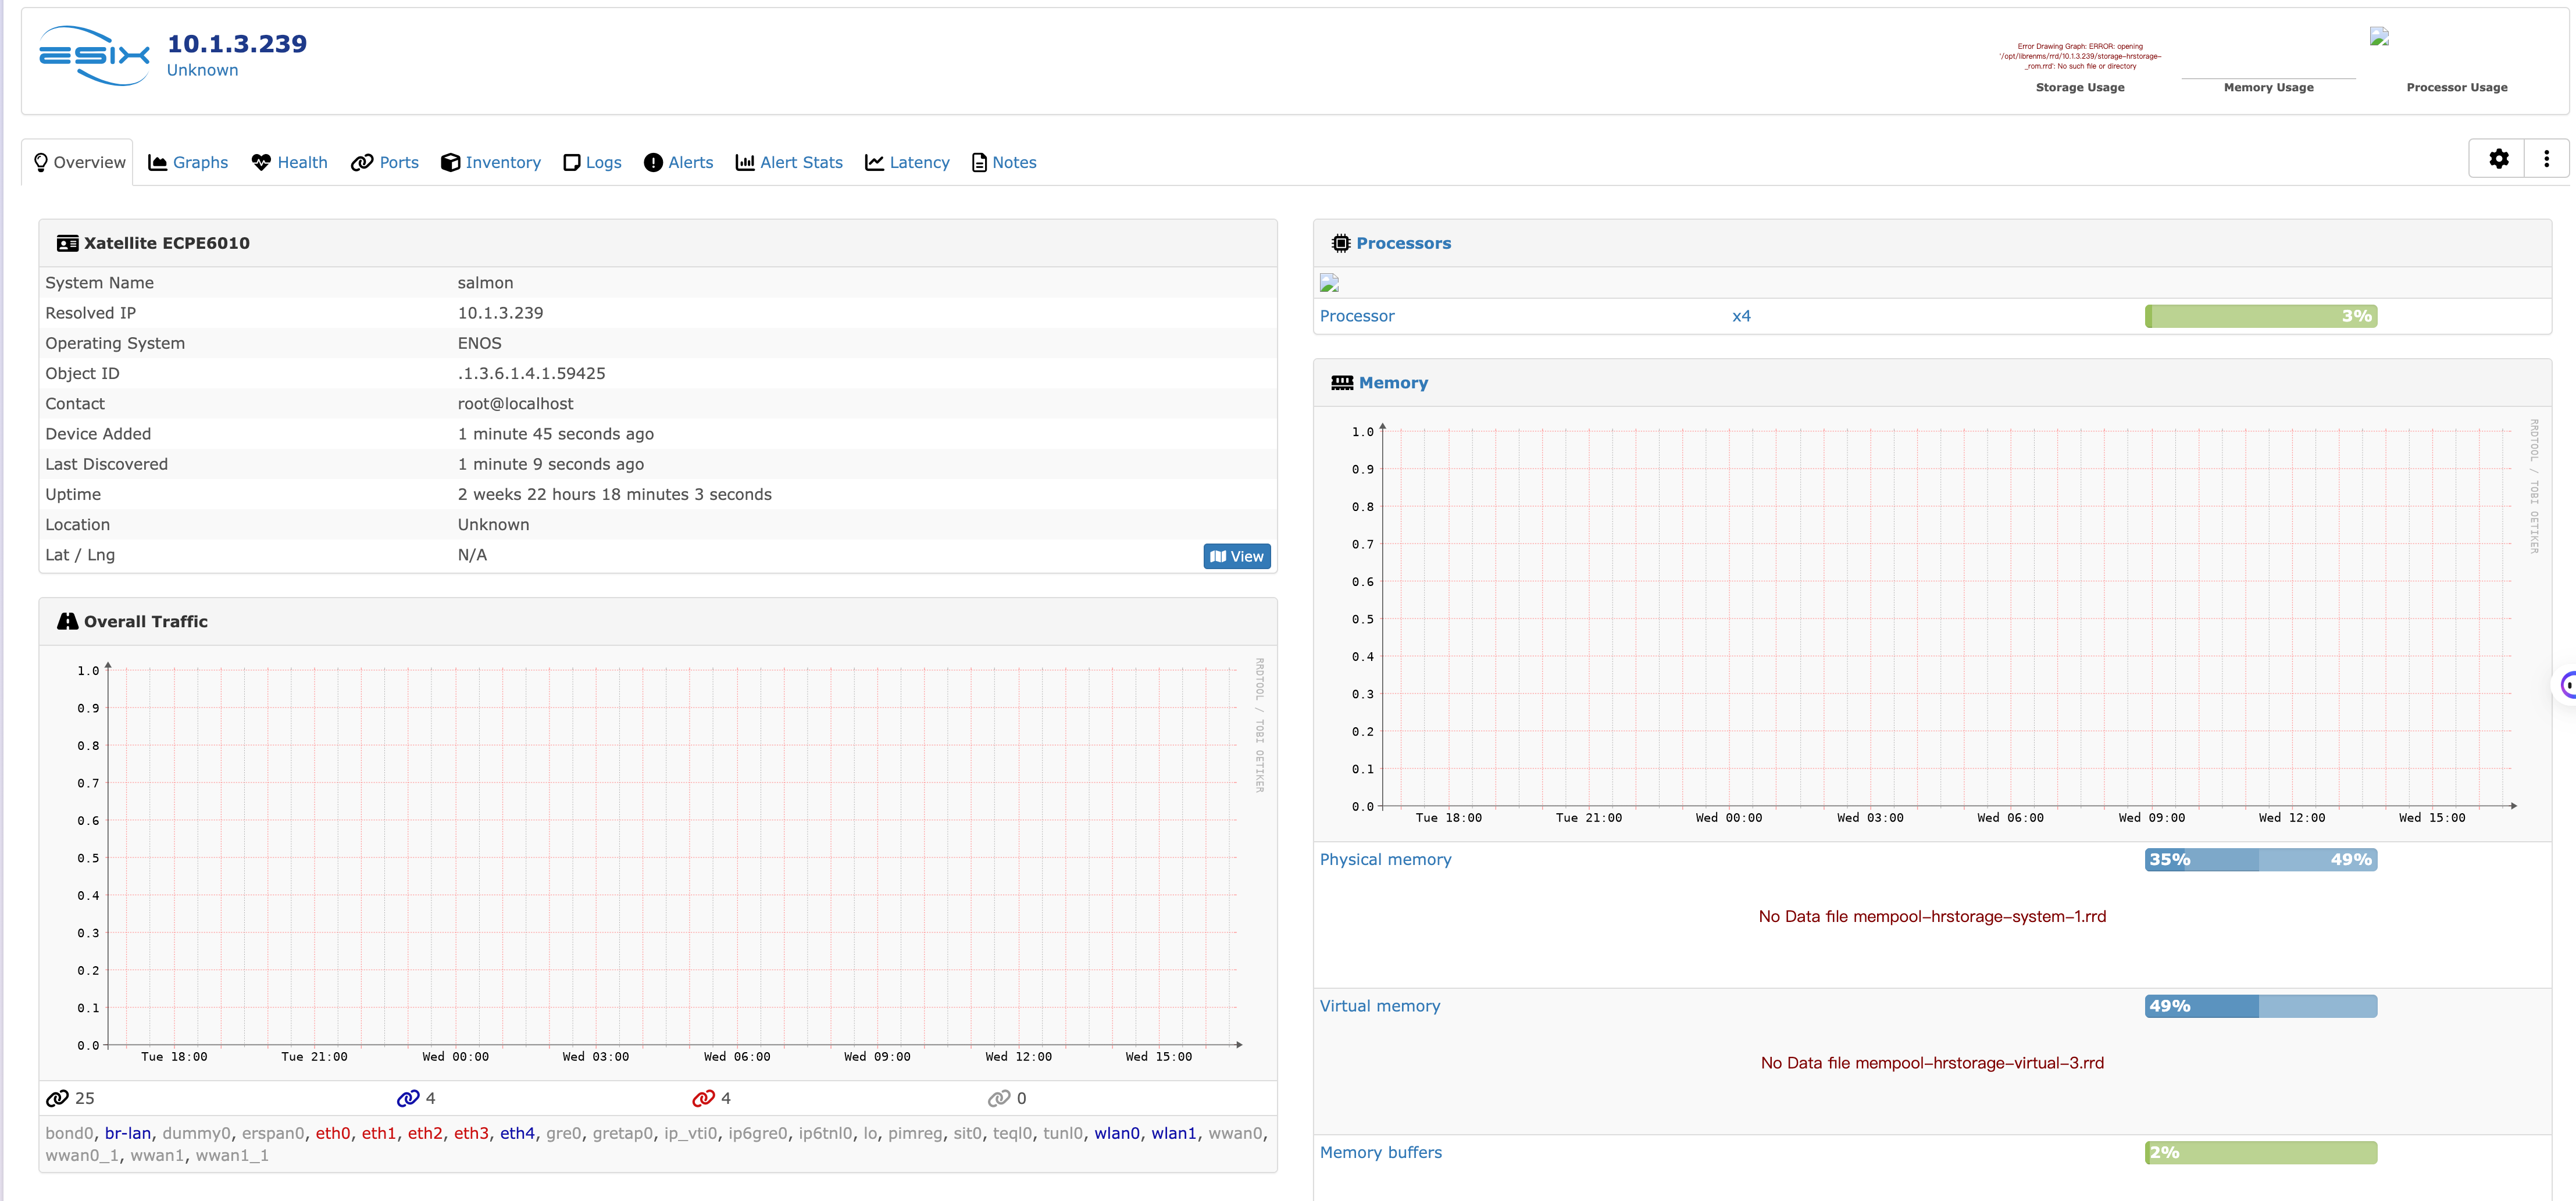
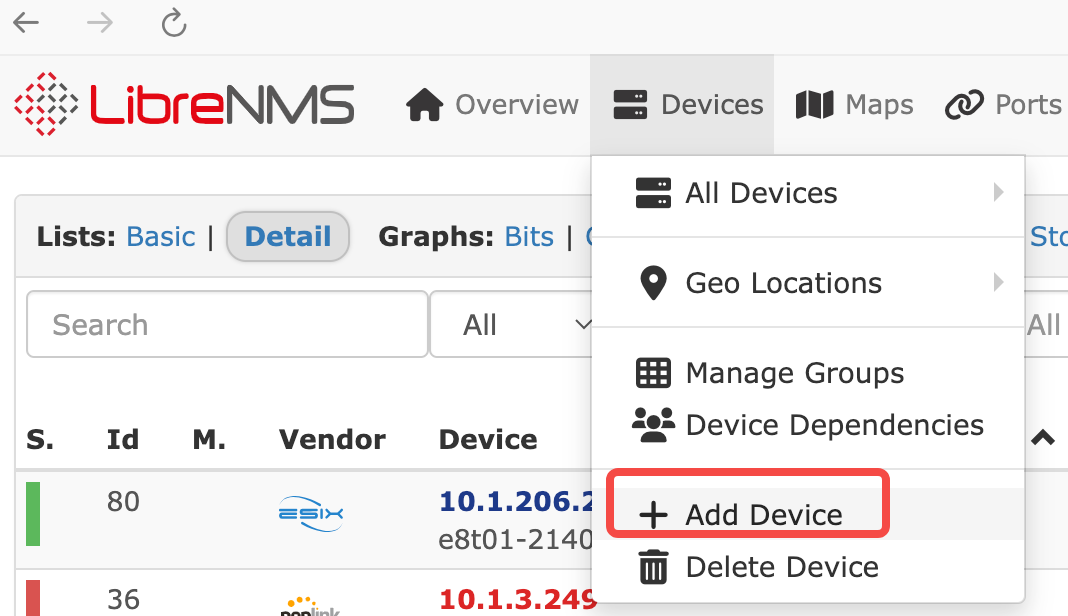
Operation Example
Taking connecting to LibreNMS as an example for demonstration:
ENOS system uses SNMPv2c
Add a device to the server
Fill in the IP address and community
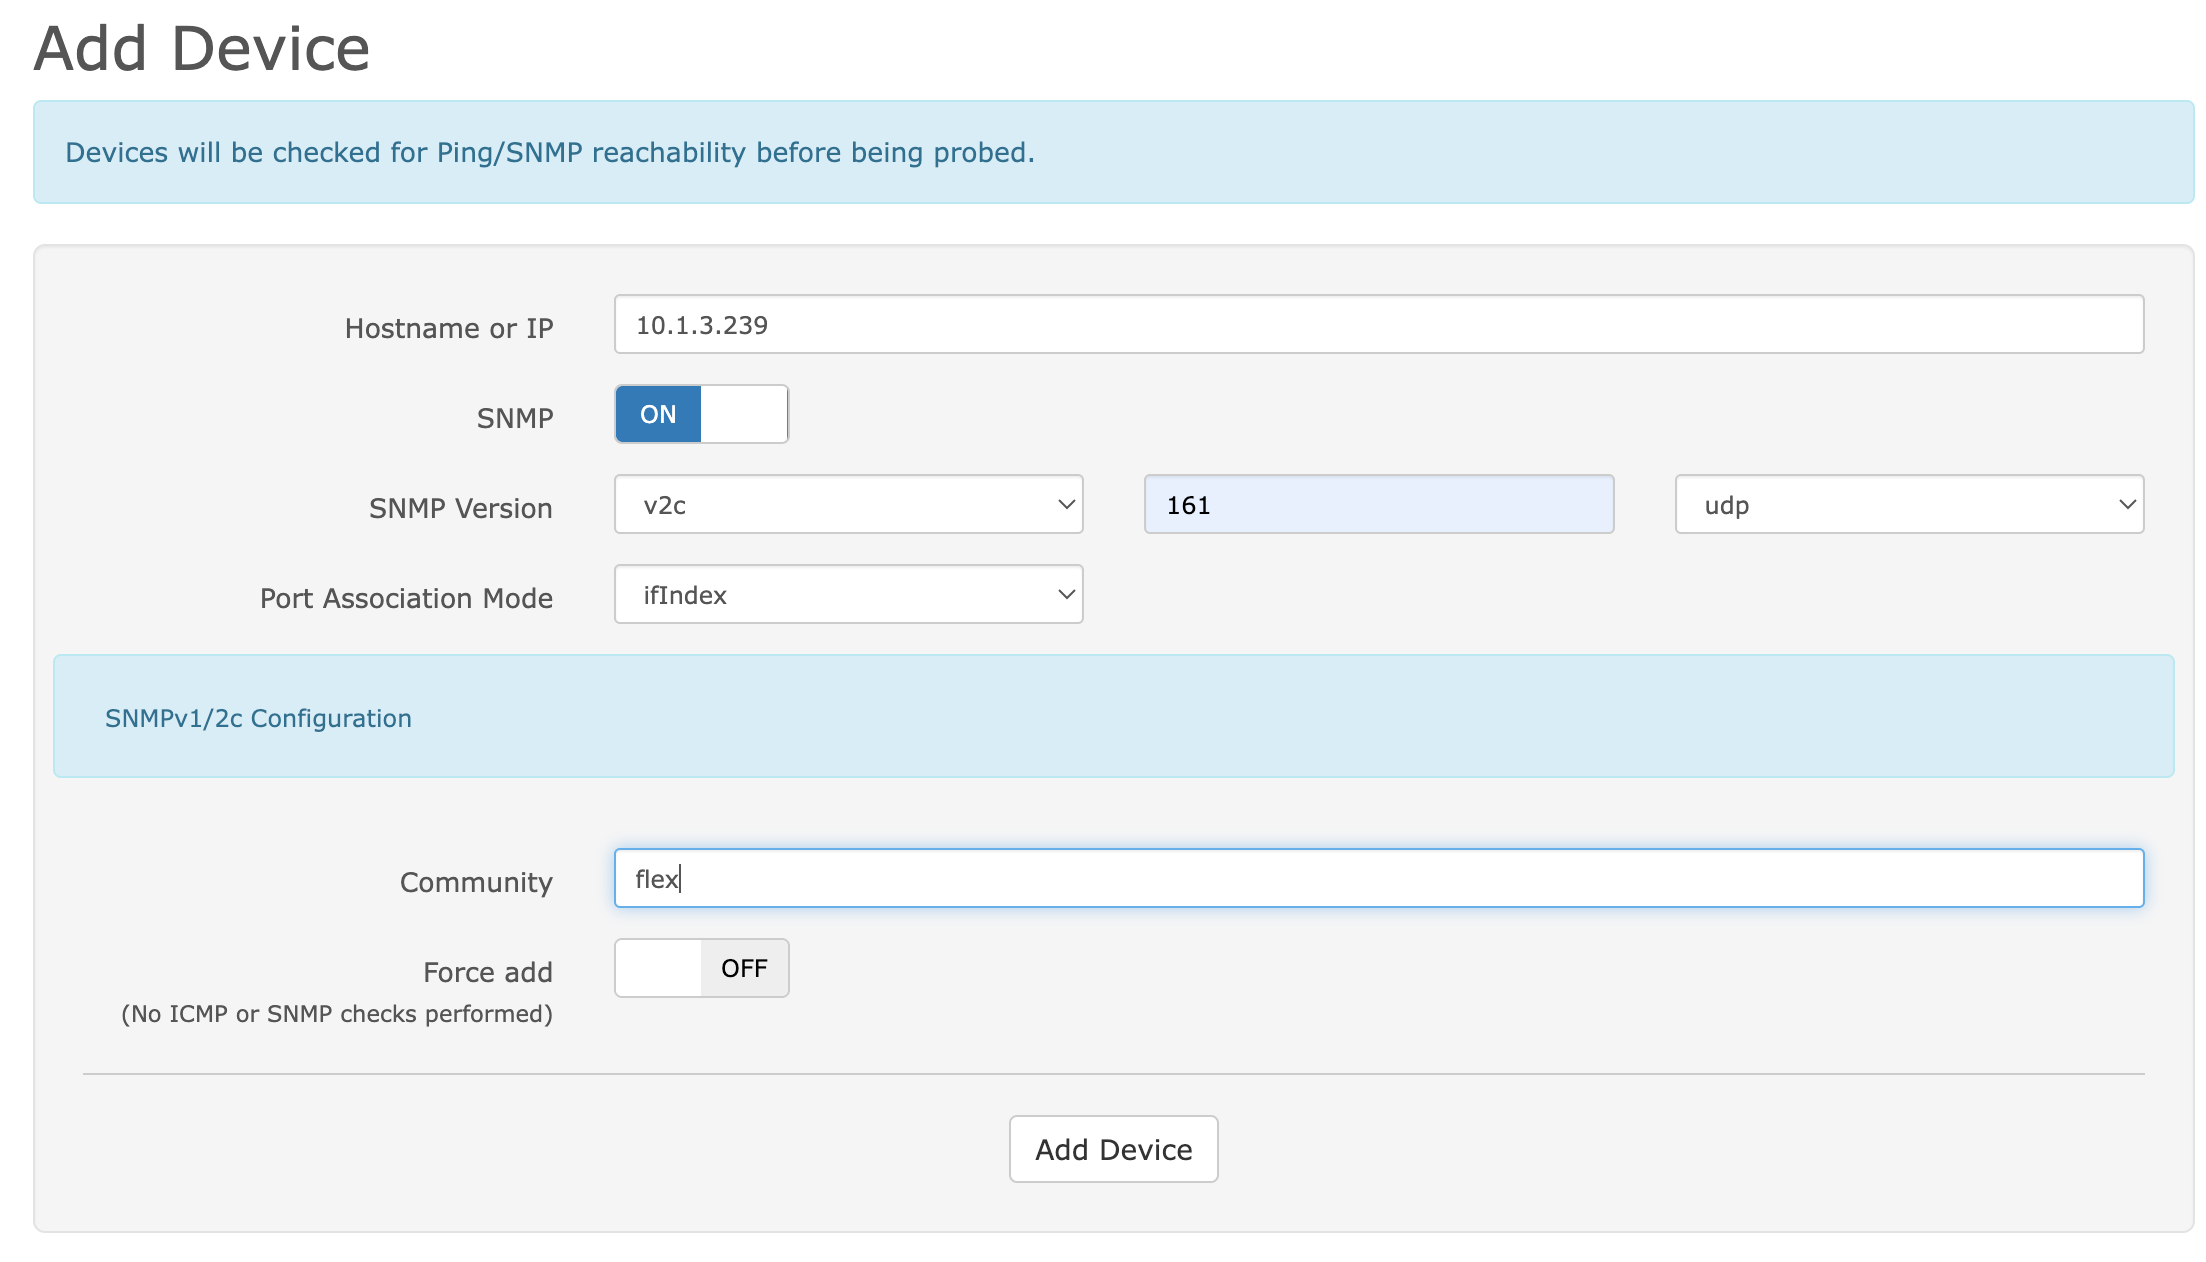
System prompts that the device has been successfully added

The system can directly monitor the device status