1. Introduction
IPfiber technology is a game-changer in the industry, one of the iconic feature is able to establish virtual layer-2 tunnel by internet broadband, LTE/5G cellular.
- Provide full feature simulated ethernet cable
- Support Layer-2 broadcast
- Any to any networking topology / protocol supported
2. Configuration steps
- Host Configuration
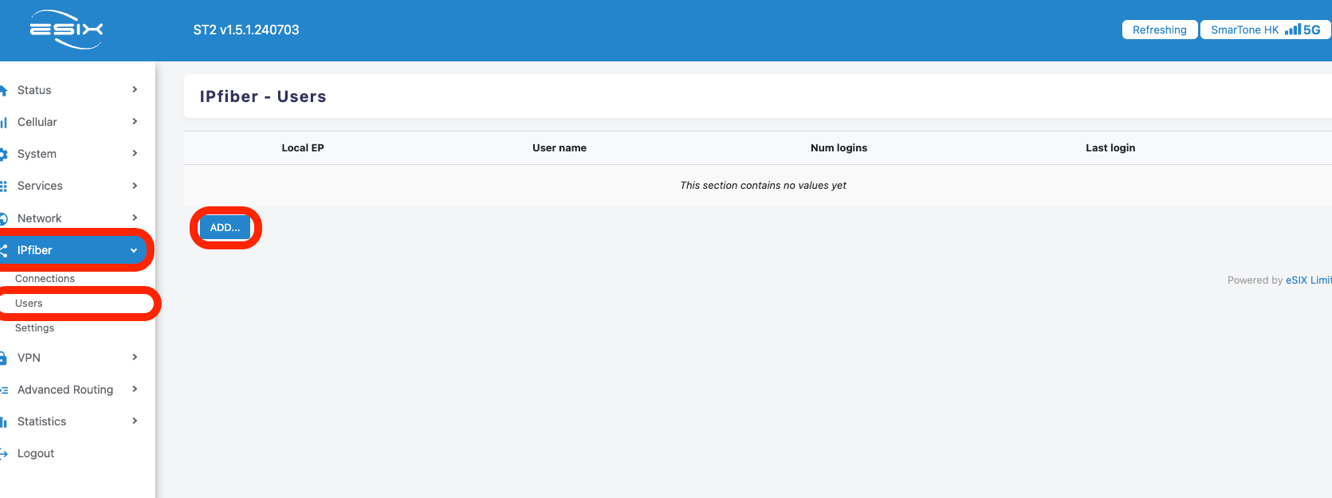
Choose IPfiber > Users. Select “ADD’ button.
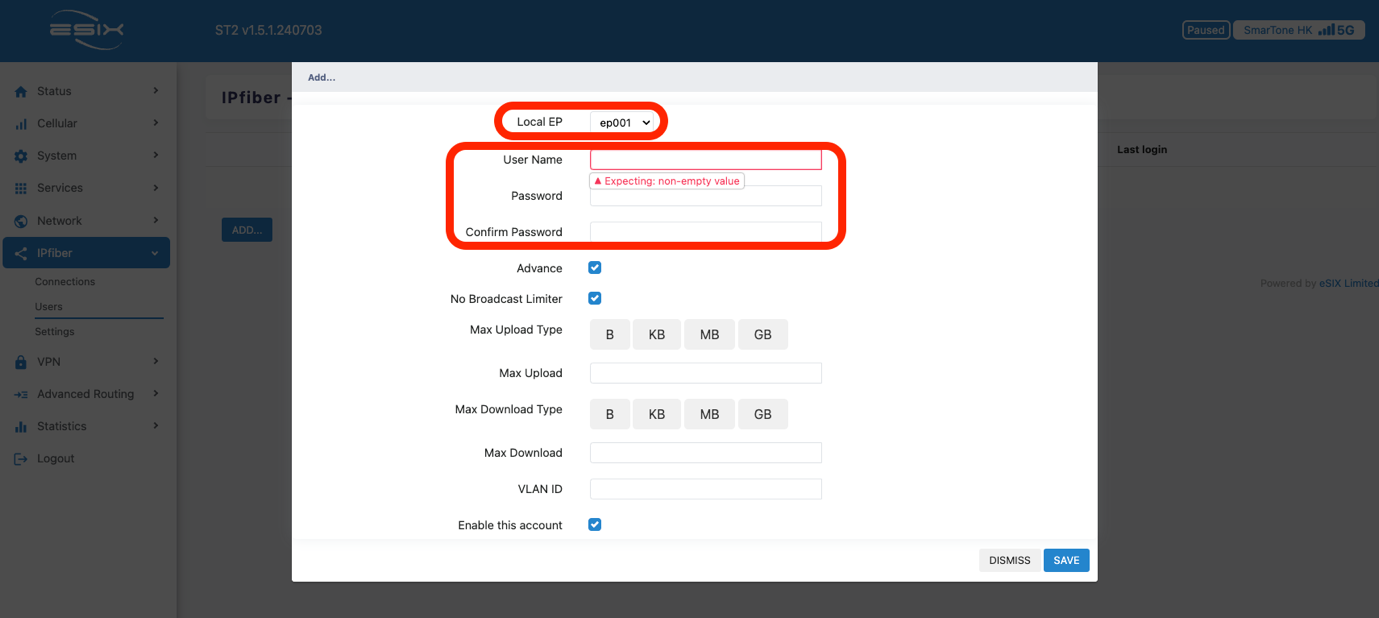
Select ep(endpoint) and design your prefer username and password.
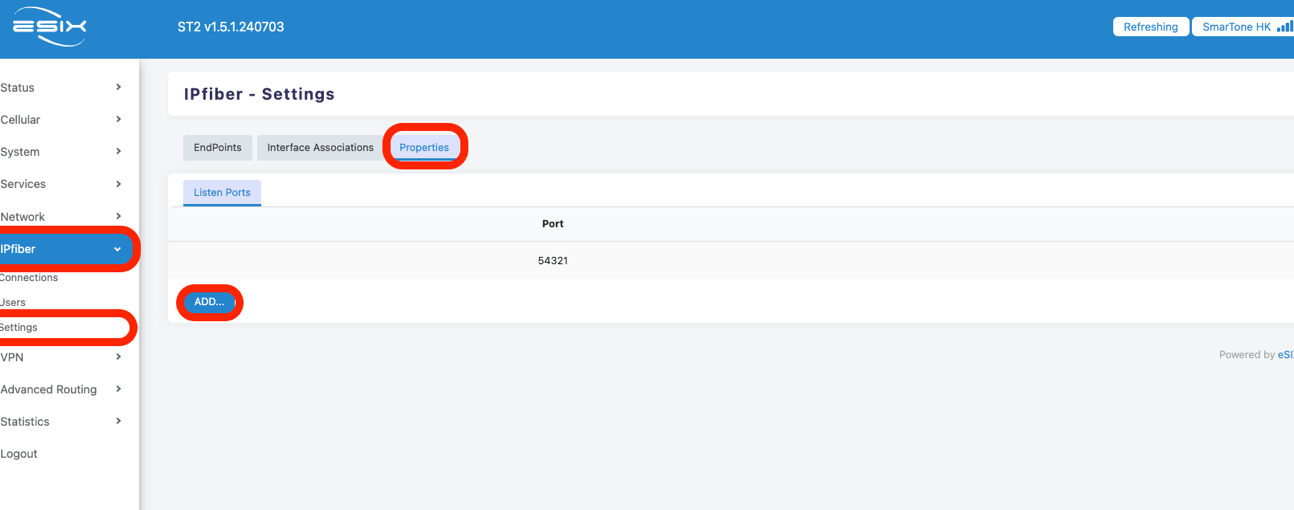
Goto -> IPfiber -> Settings -> Properties and click “ADD” button.
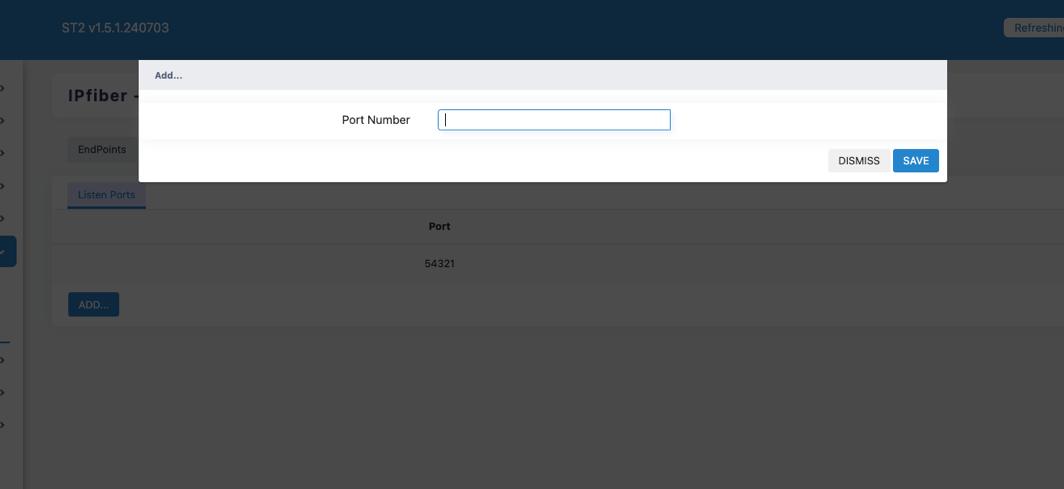
Enter listen port number one by one(e.g, 54322, 54323, 54324…etc) and save.
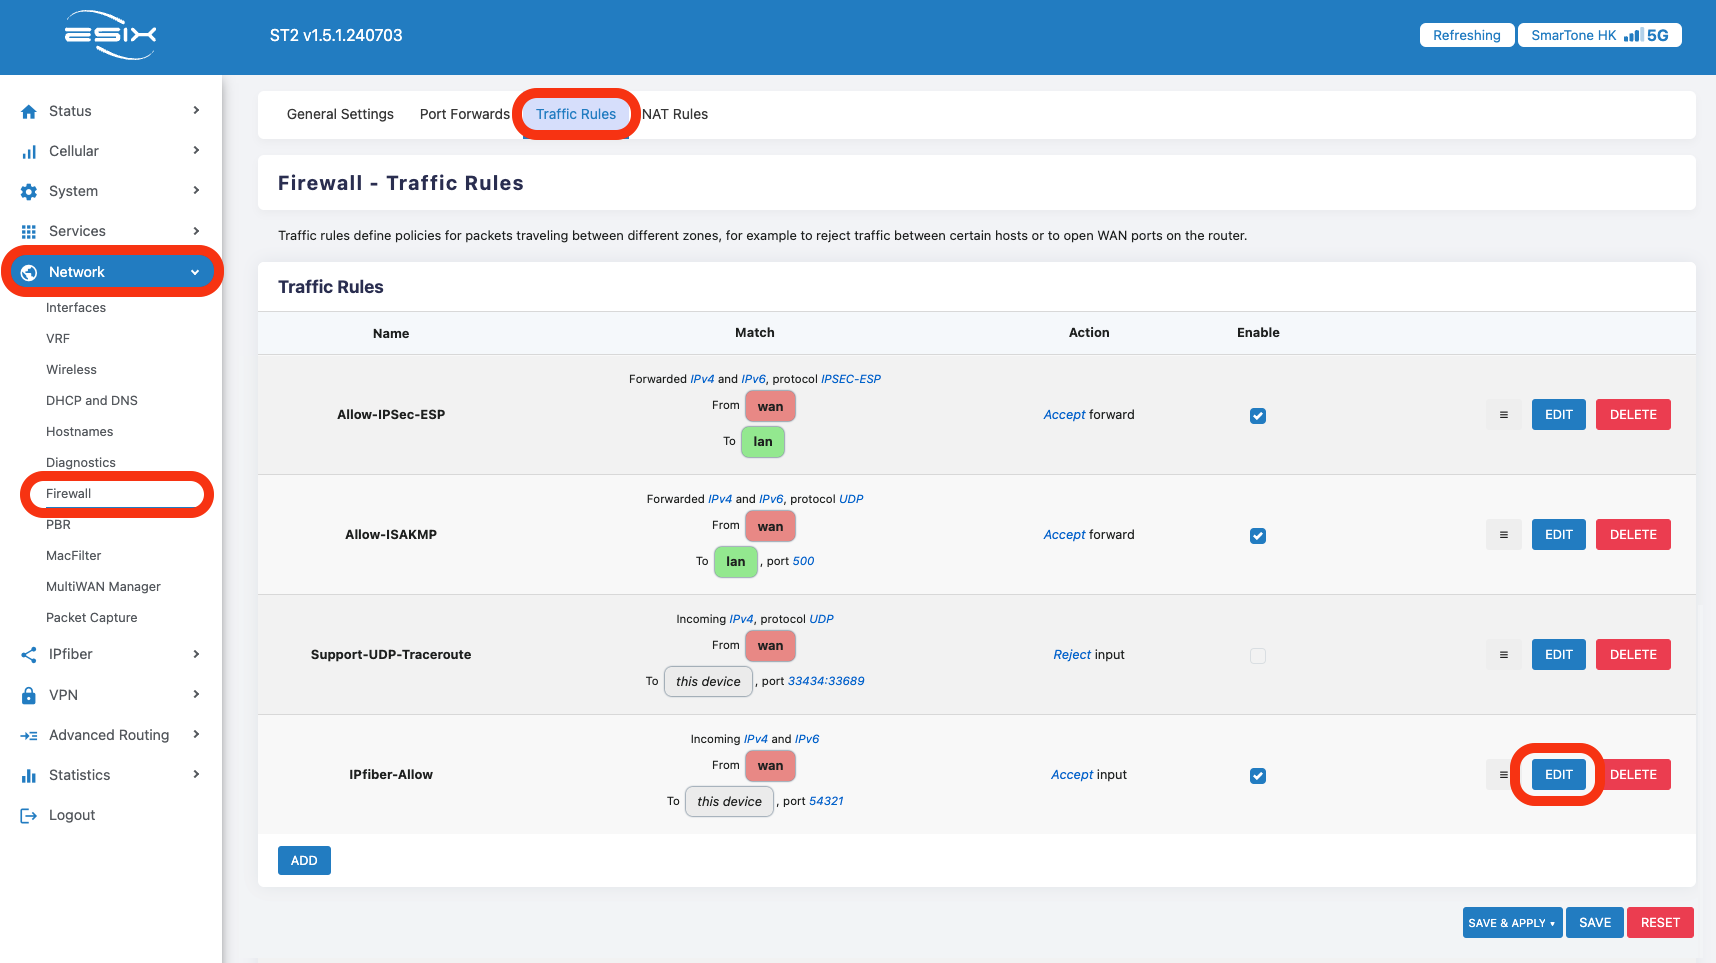
Goto -> Network -> Firewall -> Traffic Rules -> IPfiber -> Allow click “EDIT”
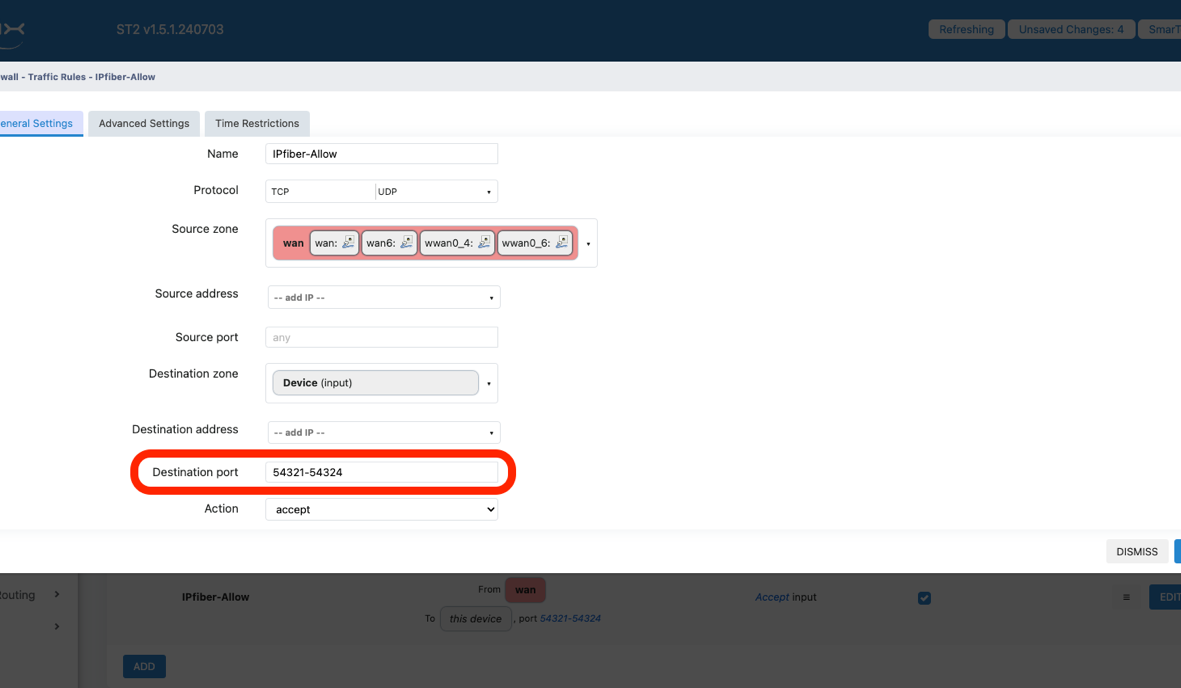
Enter port number or port range (e.g., 54321-54324) then “SAVE”
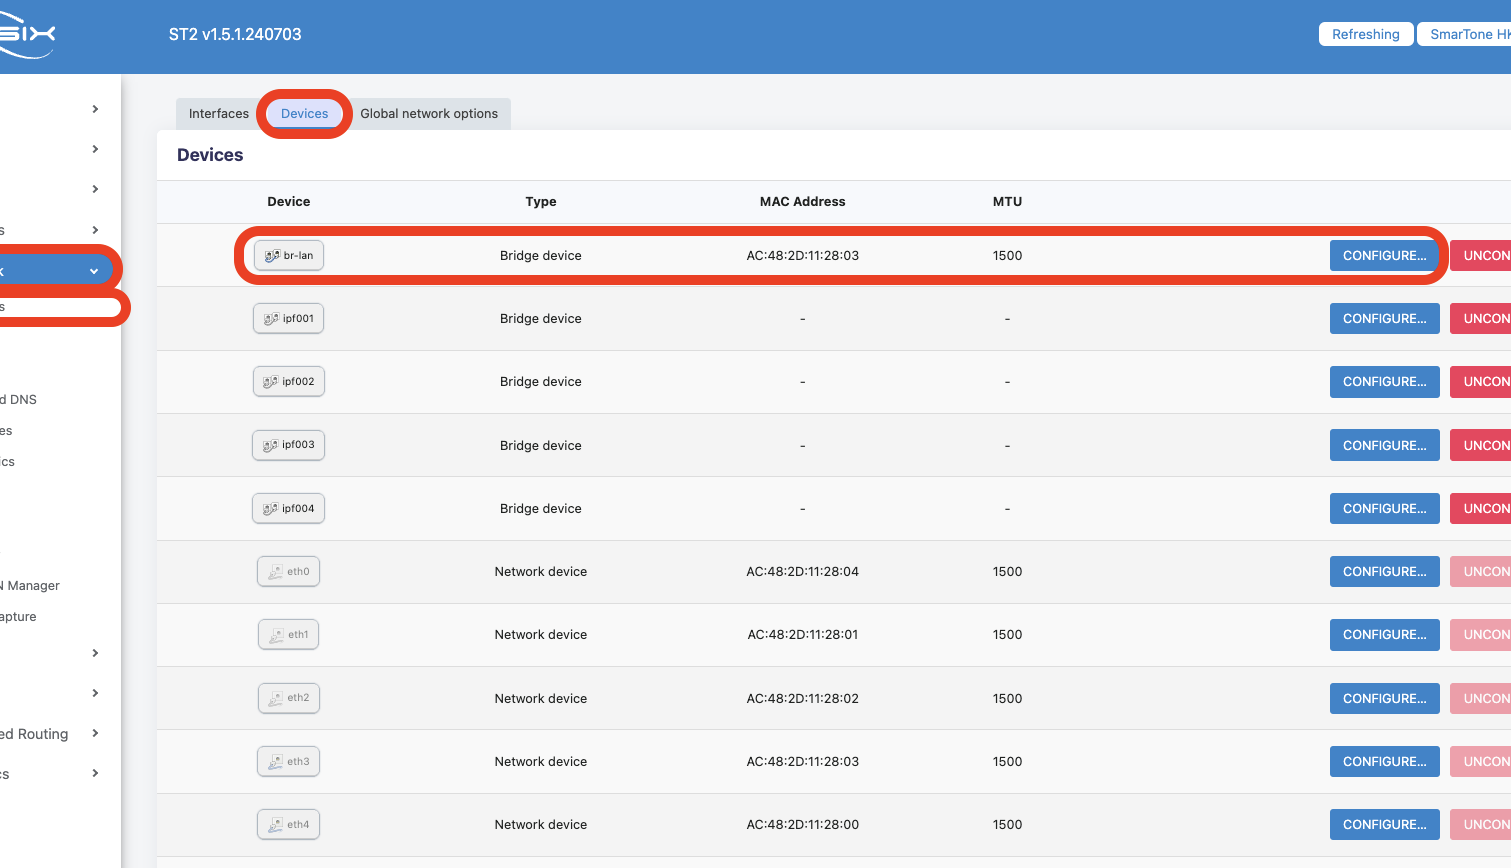
Prepare IPfiber tunnel and assign it as part of internal network. From left column -> Network -> Interfaces -> Devices -> Click “CONFIGURE…” button of br-lan device.
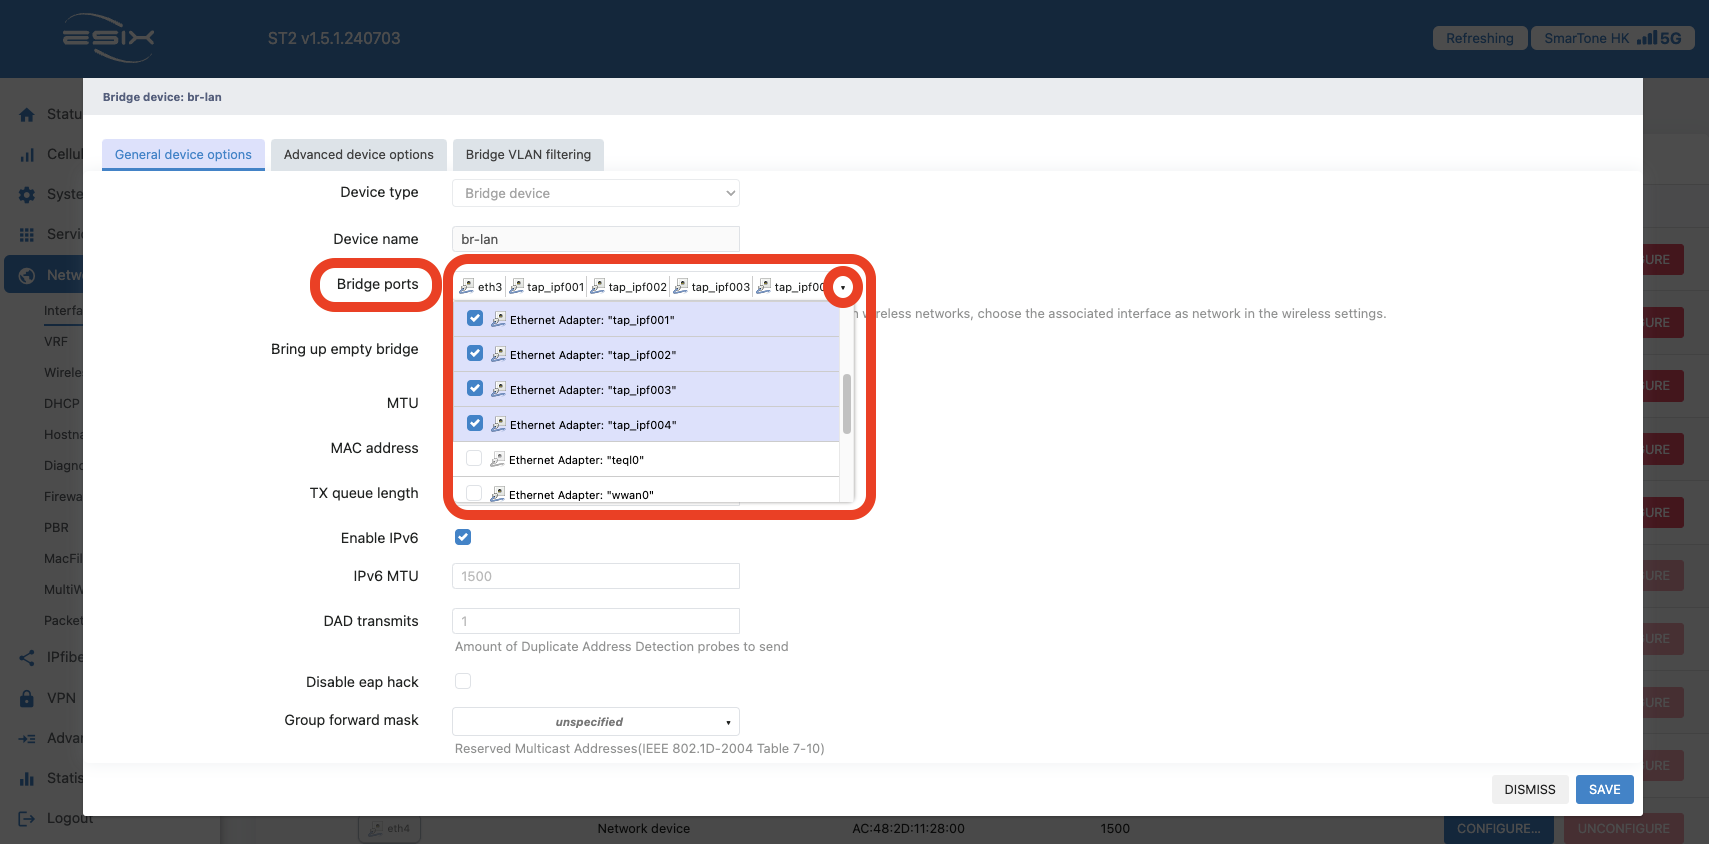
Expand “Bridge ports” manual and add all the IPfiber port (tap_ipf001, tap_ipf002….etc.,) to it. Click “SAVE” to save setting.
Remember click “SAVE & APPLY” after you‘ve made many change.

- Client Configuration
From left column -> Network -> Interfaces -> ADD NEW INTERFACE.
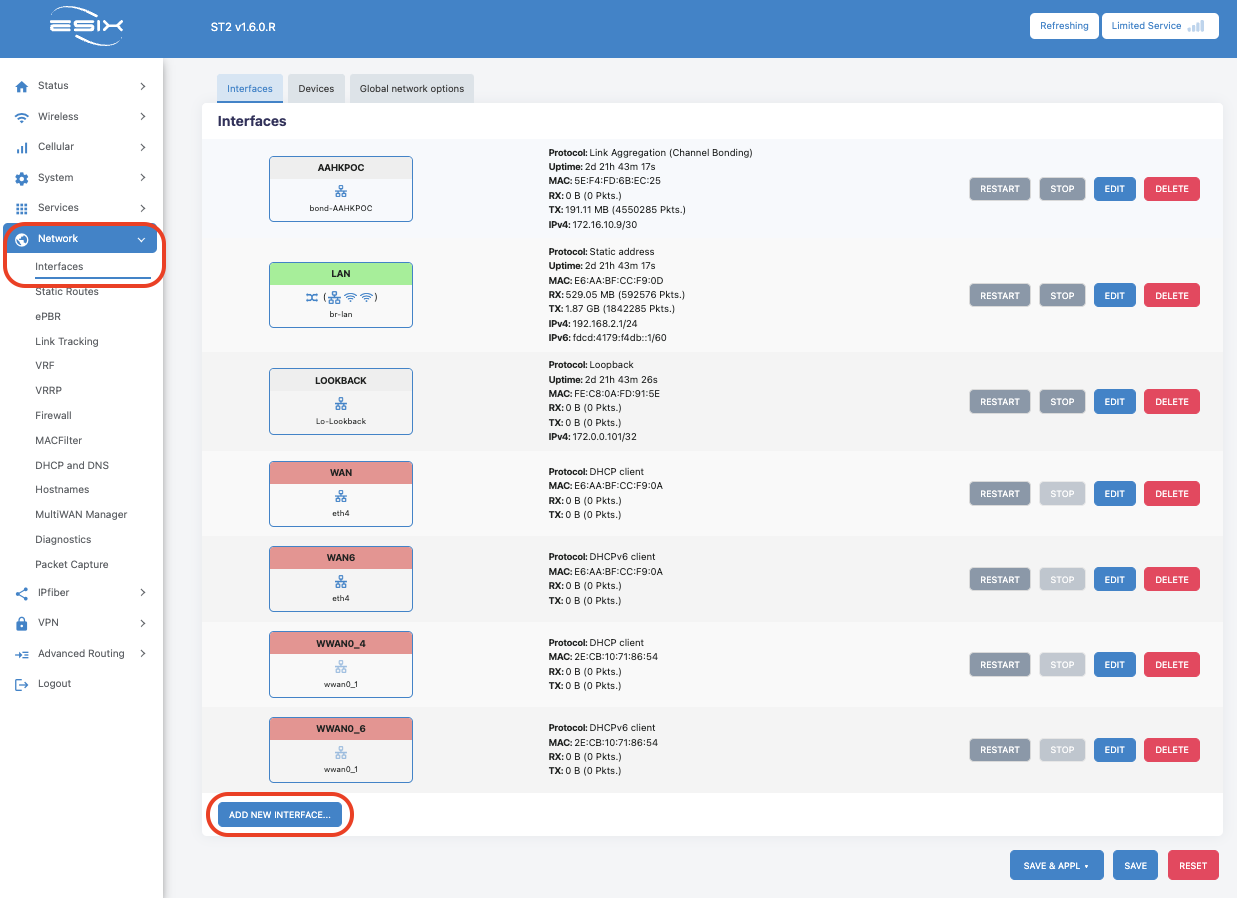
Create the new interface as below:
| Name: | Design your interface name (e.g: DYX01) |
| Protocol: | DHCP client |
| Device: | Ethernet Adapter “tap_ipf001” or “tap_ipf002” or “tap_ipf003” or “tap_ipf004” |

Create IPfiber connection. From left column -> IPfiber -> Connections -> Click “ADD” button.
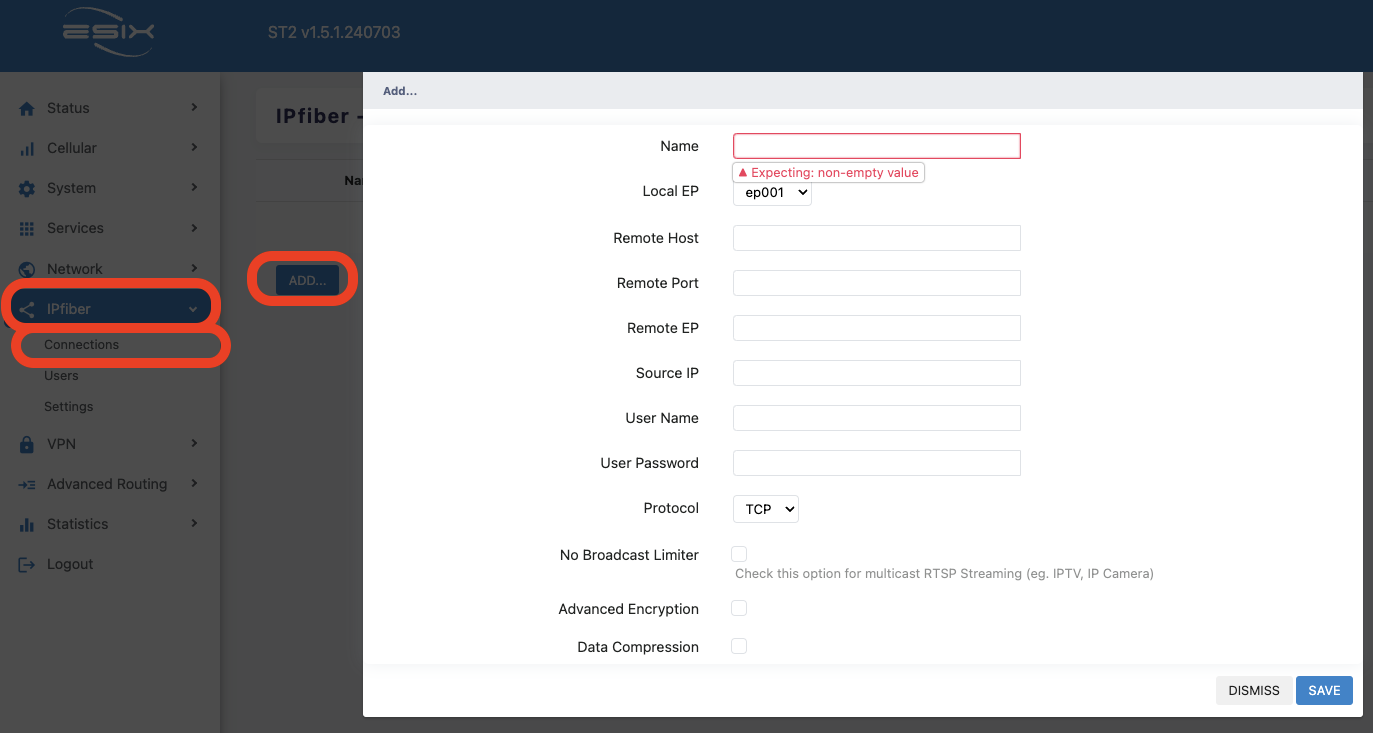
| Name: | Any name you prefer |
| Local EP: | Refer to the port you assigned in section "Client Configuration", e.g,: tap_ipf001=ep001, tap_ipf002=ep002… |
| Remote Host: | Hostname or IP Address of the server. |
| Remote Port: | The listen port the opened in section "Host Configuration". |
| Remote EP: | The port you assigned in section "Client Configuration". e.g,: tap_ipf001=ep001, tap_ipf002=ep002… |
| Source IP: | Enter 0.0.0.0 is fine. |
| User Name: | Same as the login info you created in section "Host Configuration". |
| User Password: | Same as the login info you created in section "Host Configuration". |
| Protocol: | TCP or UDP |
| No Broadcast Limiter: | Enable |
*Remember click “SAVE” when finish.
When status column go green that means IPFiber connected without abnormal.

Also go to check the new created interface, it should obtain an IP address automatically after IPFiber connected.
