1. Introduction
IPfiber technology is a game-changer in the industry, one of the iconic feature is able to establish virtual layer-2 tunnel by internet broadband, LTE/5G cellular.
- Provide full feature simulated ethernet cable
- Support Layer-2 broadcast
- Any to any networking topology / protocol supported
2. Configuration steps
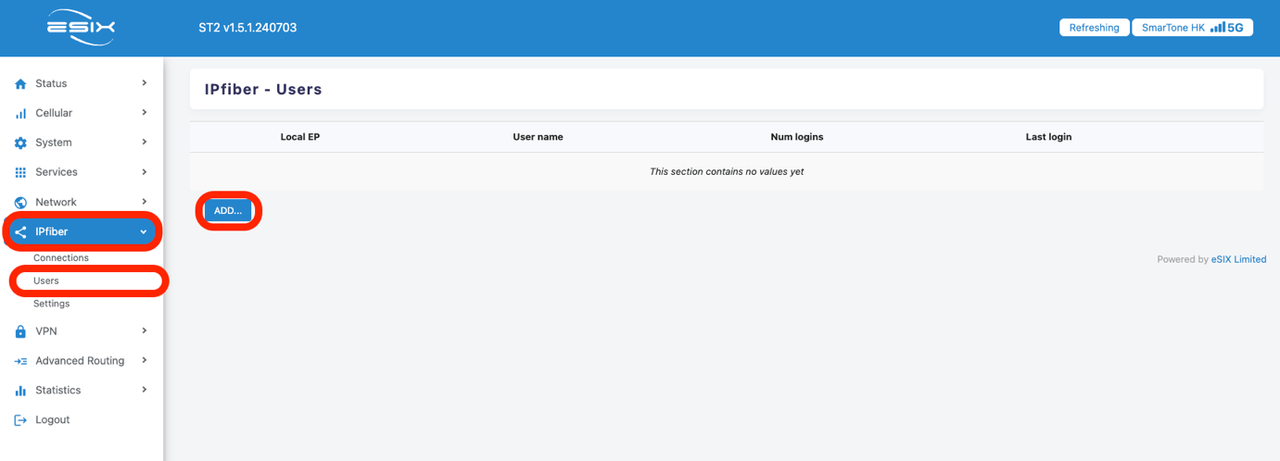
- Host Configuration Choose IPfiber > Users. Select “ADD’ button.
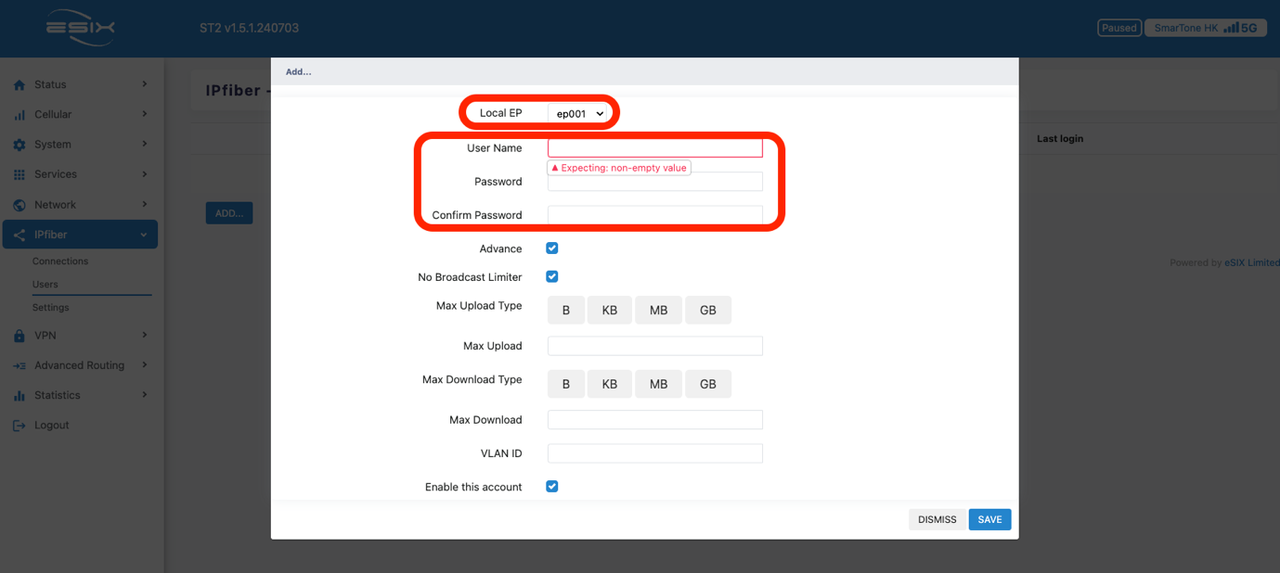
Select ep(endpoint) and design your prefer username and password.
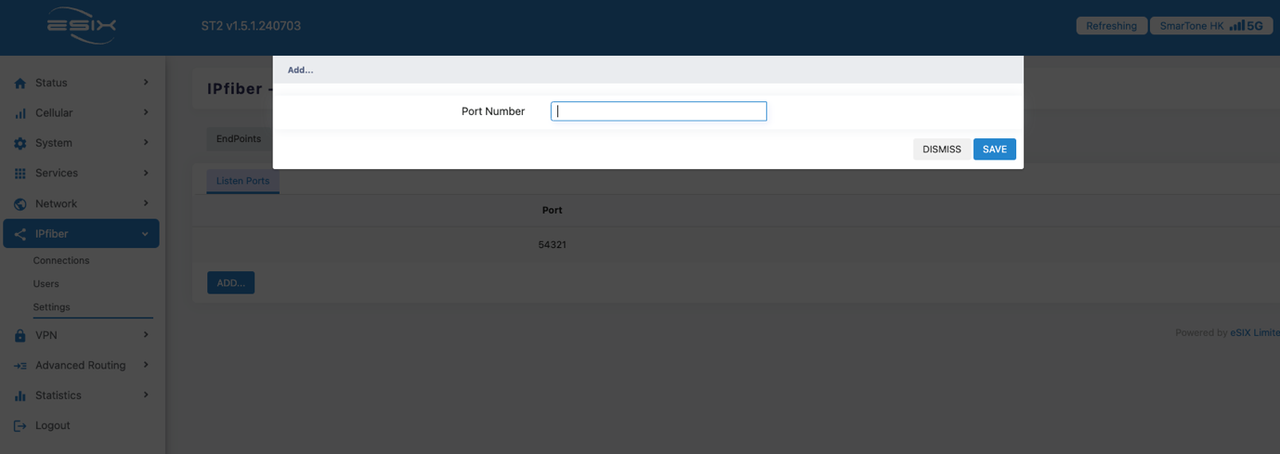
Goto -> IPfiber -> Settings -> Properties and click “ADD” button.

Enter listen port number one by one(e.g, 54322, 54323, 54324…etc) and save.
Goto -> Network -> Firewall -> Traffic Rules -> IPfiber -> Allow click “EDIT”
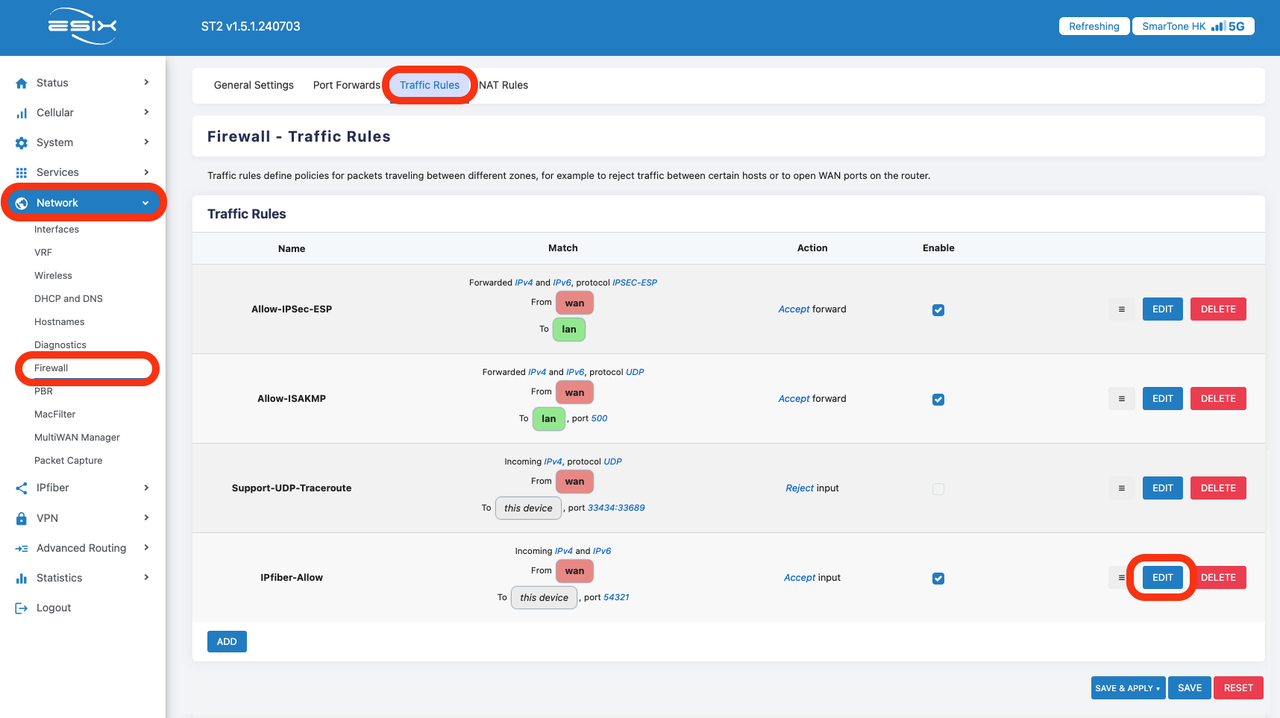
Enter port number or port range (e.g., 54321-54324) then “SAVE”

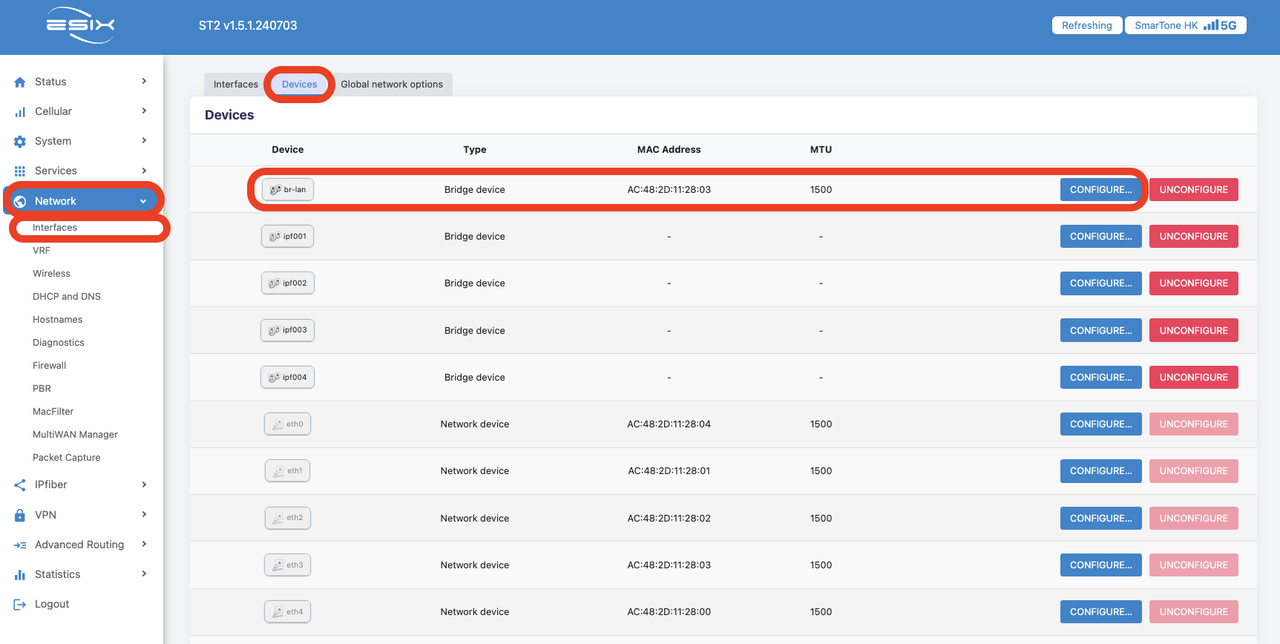
Prepare IPfiber tunnel and assign it as part of internal network. From left column -> Network -> Interfaces -> Devices -> Click “CONFIGURE…” button of br-lan device.

Expand “Bridge ports” manual and add all the IPfiber port (tap_ipf001, tap_ipf002….etc.,) to it. Click “SAVE” to save setting.
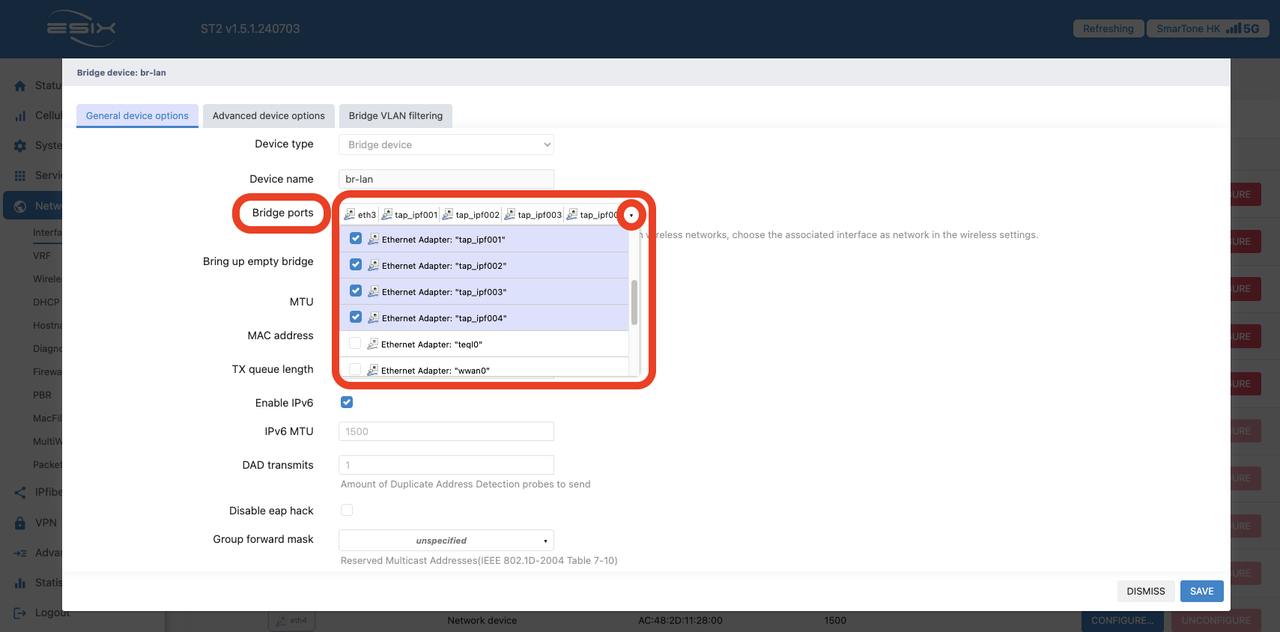
Remember click “SAVE & APPLY” after you‘ve made many change.

- Client Configuration
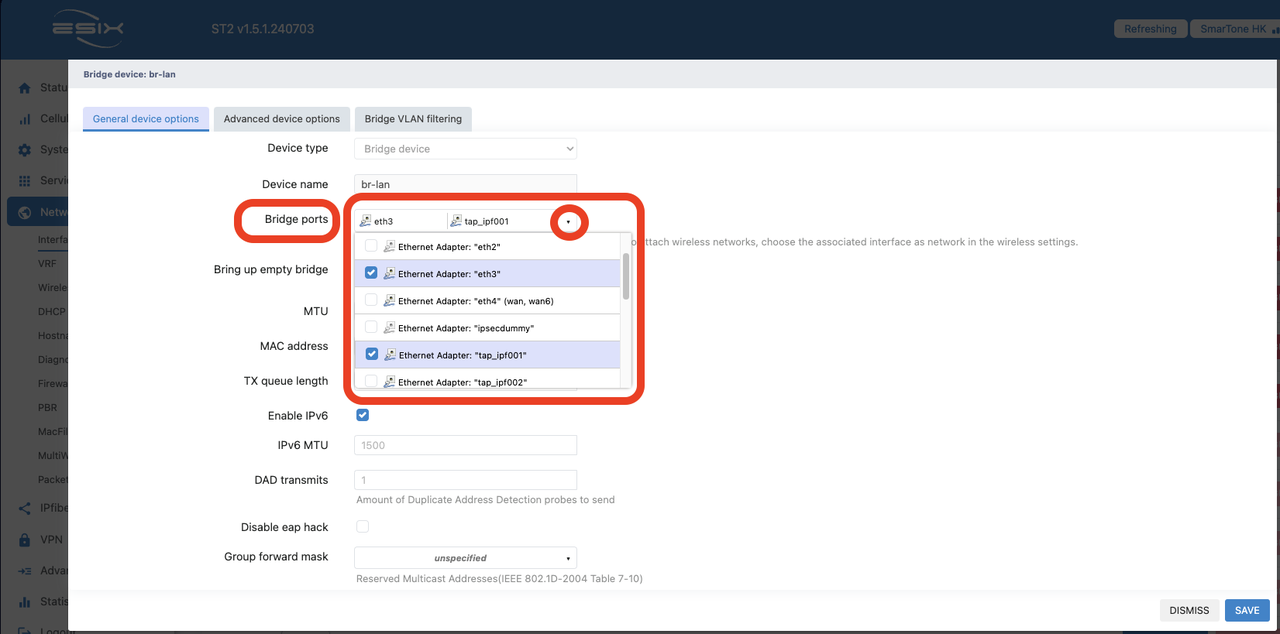
From left column -> Network -> Interfaces -> Devices -> Click “CONFIGURE…” button of br-lan device.
Expand “Bridge ports” manual and add tap_ipf001 to it. Click “SAVE” to save setting.
Create IPFiber connection. From left column -> IPfiber -> Connections -> Click “ADD” button.
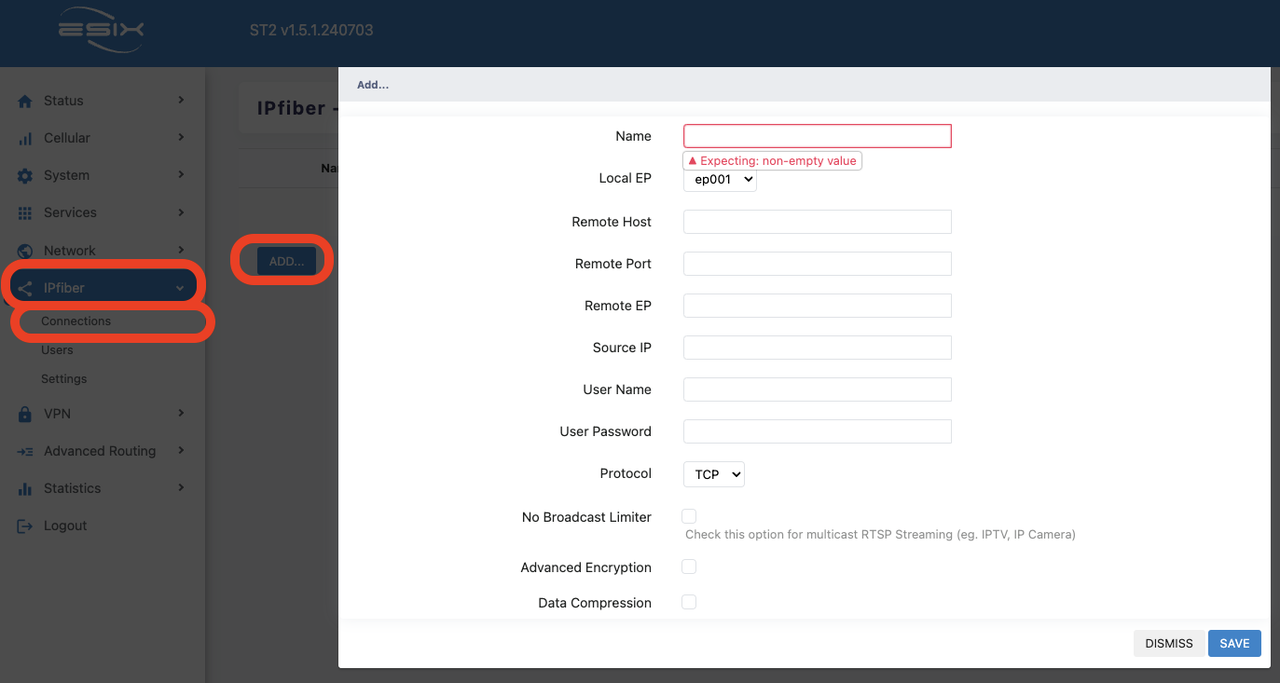
| Name: | Any name you prefer |
| Local EP: | Refer to the port you assigned in section "Client Configuration", e.g,: tap_ipf001=ep001, tap_ipf002=ep002… |
| Remote Host: | The listen port the opened in section "Host Configuration". |
| Remote EP: | The port you assigned in section "Client Configuration". e.g,: tap_ipf001=ep001, tap_ipf002=ep002… |
| Source IP: | Enter 0.0.0.0 is fine. |
| User Name: | Same as the login info you created in section "Host Configuration". |
| User Password: | Same as the login info you created in section "Host Configuration". |
| Protocol: | TCP or UDP |
| No Broadcast Limiter: | Enable |
*Remember click “SAVE” when finish.
When status column go green that means IPFiber connected without abnormal.
